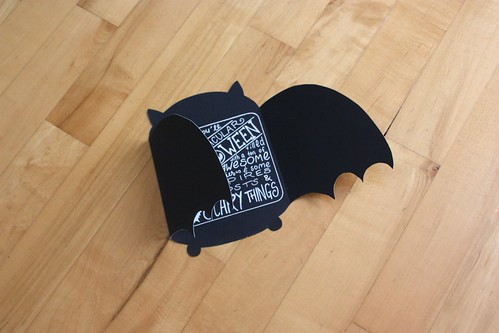
What better than a bat? It's the perfect shape too, since I can cover the message as I would in a more traditional card and it's a definitely an easily recognizable shape. Coming up with a template was fairly straightforward. If you want to try this out, I recommend thinking about the dimensions of the card in advance depending on your piece of paper.
I was going to use standard scrapbooking paper, which is 12x12 inches. And, I am all about optimizing the paper use, so it just made sense that the cards would be 6 inches high. This also made it easy to figure out the dimensions for the wings and body, 4 inches each. In reality, the wings should be a smidgen smaller than the body, because otherwise you'll have a hard time folding them over each other. You can do this by either making the body a tad wider than the wings or just cutting the wings shorter in the next step.
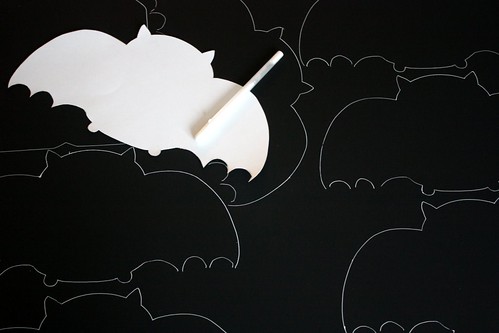
Once you have the paper measured and cut, you can sketch out the the basic shape of the bat. I used the entire height of the paper for the body. It's basically a wide oval shape with ears at the top and since I felt like making a cute(ish?) bat, teeny tiny round shapes as feet at the bottom. The feet aren't necessary at all, just round out the bottom and you'll make this even easier.

Once the body is sketched out, then it's time for the wings. They are a fairly simple shape, so that should be easy, but there's a few things to keep in mind. The idea of the wings is to cover the message inside and allow the recipient to open the card. This means that you should try to make the wings as large as possible. I also think it looks nicer if the wings are a bit shorter than the body of the bat, that way you can see the shape immediately. And finally, if you keep the wing shape round and chubby, it'll also be much easier to cut out.
I don't think the wings necessarily need to be identical, but it you want them to be, the easiest way to do so, is to fold the template in half once you have one wing done and then tracing that shape onto the other wing.
 Once the template is done, trace the bat onto the paper and cut out. Like mentioned, I was planning on using scrapbooking paper, but happened to bump into some poster paper (poster board? whatever it's called. Those big pieces of paper) before finding black scrapbooking paper, so I ended up going with that.
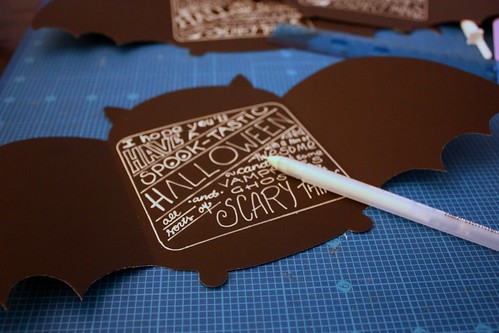
 After cutting and folding the cards (I recommend folding the wings before you start writing the cards, it's much easier to get the text in the center of the card that way) pick up a pen and and start writing. I used a white gel pen.
I made the envelopes out of tracing paper, you can see more about them, including how to make them, HERE
So, what's the verdict? Would you try these out?
P.S. I used this same format for my Lovely Letters task 2, since someone already asked about that. I can show more, but I want to make sure my partner gets it first!


I absolutely loved mine! Kiiitos! :)
ReplyDeleteOle hyva! Aina ihana kuulla, etta mun rapellyksista tykataan! XD
DeleteThis is so cool. I wish I'd be crafty and able to do stuff like that. ^^ Never heard of anyone sending out Halloween cards before...?
ReplyDeleteThank you! To be honest, I haven't heard about Halloween cards either... I mean, I've seen some, but figured it's not like Christmas or anything. But, then I figured who wouldn't love getting mail!
DeleteI love how you're like "It's basically a wide oval shape with ears at the top..." and make it sound so easy. I can barely write my own name most days and if I'm telling the truth, you essentially lost me at "I recommend thinking about the dimensions of the card.." GAH!! TOO COMPLEX FOR ME! TOO COMPLEX!! BRAIN MELTING... While this might seem like a joke, I'm about 89.9% serious. I SUCK at paper crafts.
ReplyDeleteHOWEVER, I rock at appreciating them and your bat card is superbly cool. :)
Thank you!
DeleteI have to admit I just wing it (pun appropriate but not intended, but I will claim it was) most of the time. I've figured it down to a science when it comes to stuff for my shop, but anything else is just sort of thrown together. I am trying to be precise just in case someone is actually using these instructions to make them too.
Awww, your cards are adorable!
ReplyDeleteThank you! I'm quite happy how they turned out!
DeleteI enjoyed reading your poost
ReplyDelete