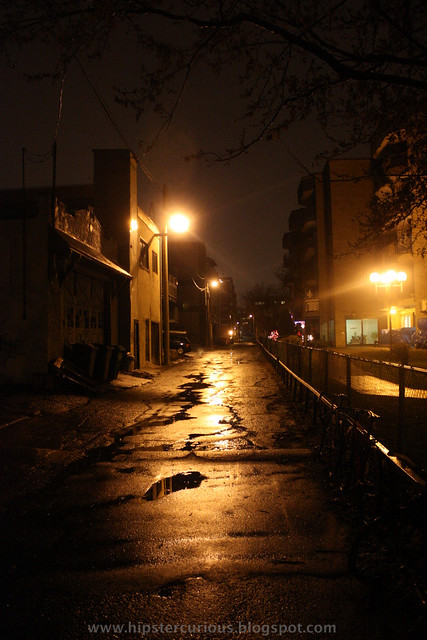
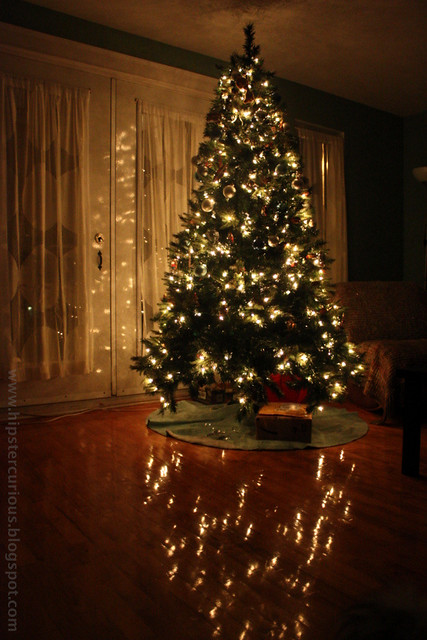
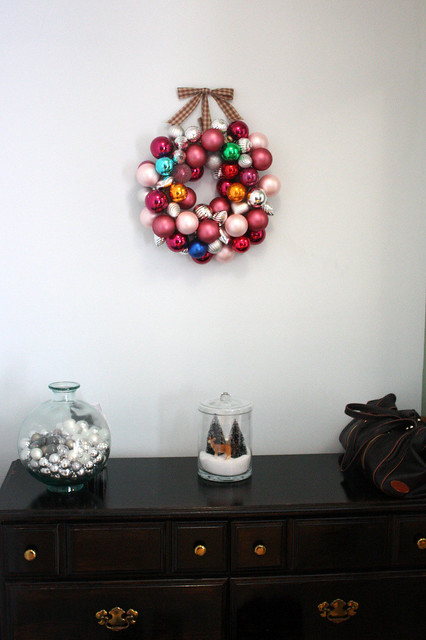
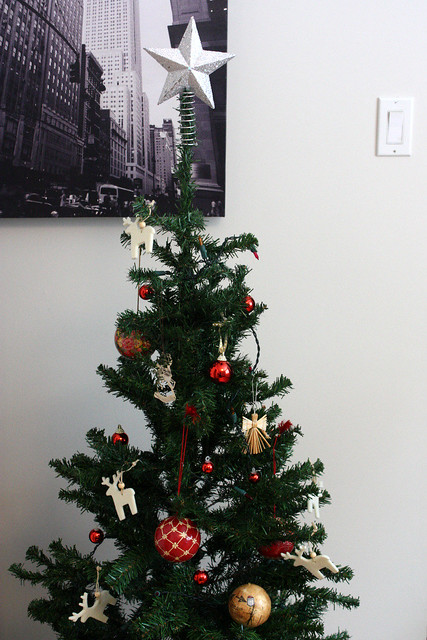
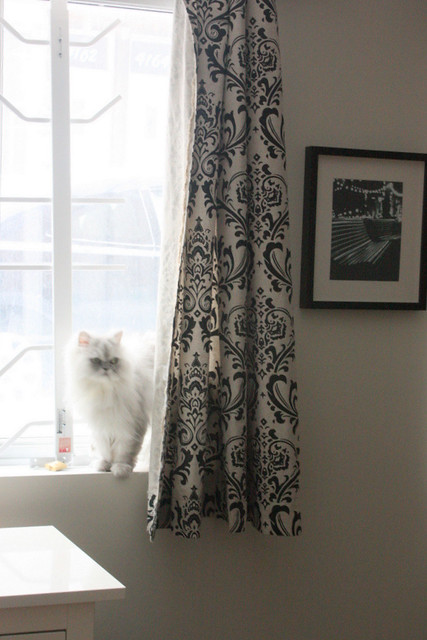
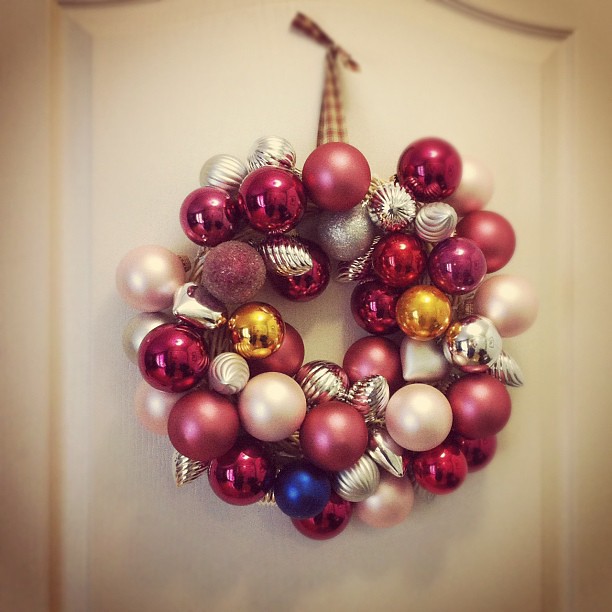
Bring it on! I'm now ready for the holiday season!
Are you ready?
Showing posts with label Christmas. Show all posts
Showing posts with label Christmas. Show all posts
Wednesday, November 18, 2015
Thursday, December 4, 2014
Crafternoon Tea in Leslieville - Saturday, December 6th
Hi guys,
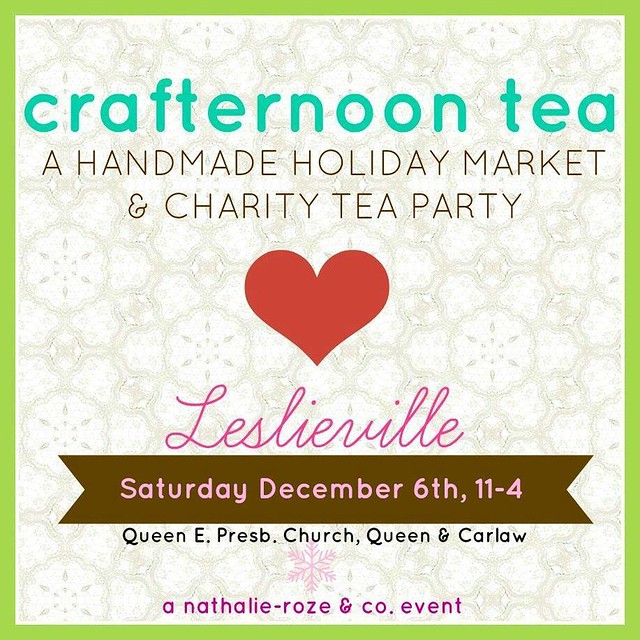 There will be over 25 vendors, and the majority of the items will be under $50! So, this is a great opportunity to find some Christmas presents, stocking stuffers or just find something fun for yourself! I will bring back the hugely popular $5 items, notebooks, greeting cards, stickers and ornaments!
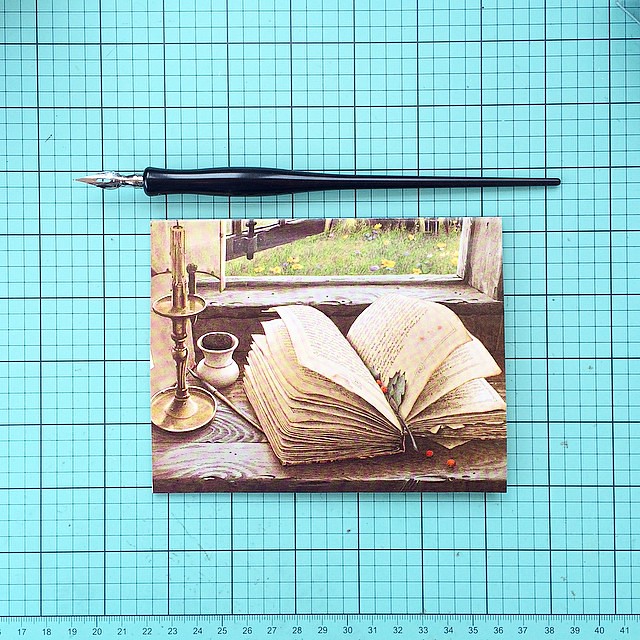 Come by to say hi and check out the charity tea party!
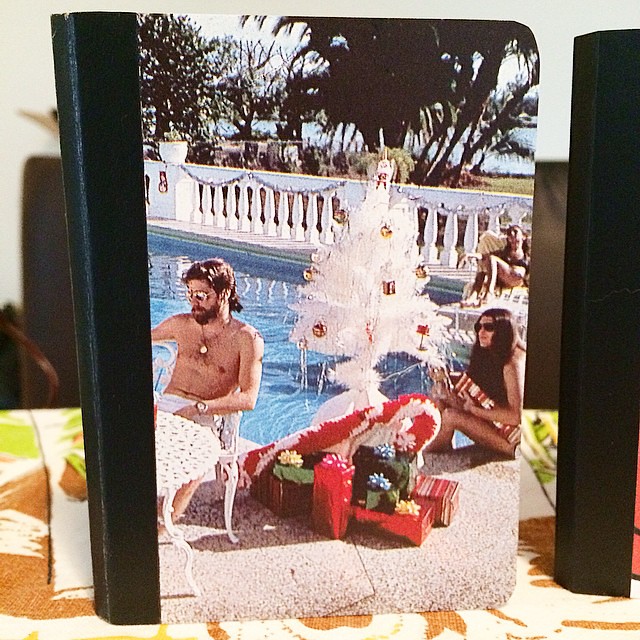
P.S. This awesome 70s poolside hunks with a Christmas tree notebook will also be available! It's one of a kind, so first come, first serve!
It's been two years since I attended a craft show as a vendor, so it's about time! This Saturday, December 6th 2014, will be my first show here in Toronto. I'm attending the Craftnernoon Tea show on Queen St. East, corner of Carlaw.
 There will be over 25 vendors, and the majority of the items will be under $50! So, this is a great opportunity to find some Christmas presents, stocking stuffers or just find something fun for yourself! I will bring back the hugely popular $5 items, notebooks, greeting cards, stickers and ornaments!
 Come by to say hi and check out the charity tea party!
P.S. This awesome 70s poolside hunks with a Christmas tree notebook will also be available! It's one of a kind, so first come, first serve!

Tuesday, November 25, 2014
29 days to Christmas
Advent Calenders are the best! If you're thinking of making one for someone special, now's the time to collect your materials!
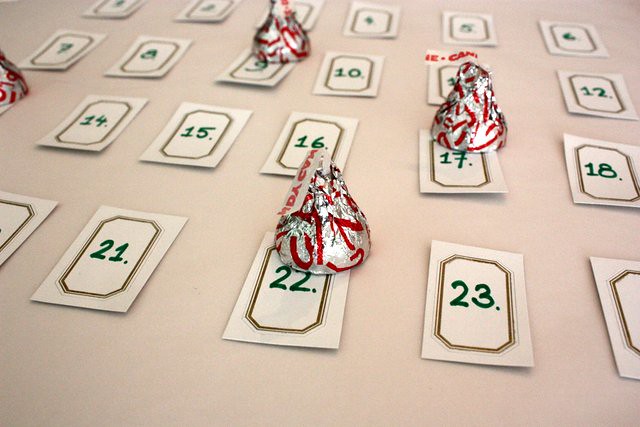
I've made a few calendars over the year and they are always so much fun to make. Basically just collect 24 or 25 (depending when you celebrate Christmas) little prizes, candy, toys, stationery, etc... Wrap them up in little packages, number them from 1 to 24 or 25 and you're done!
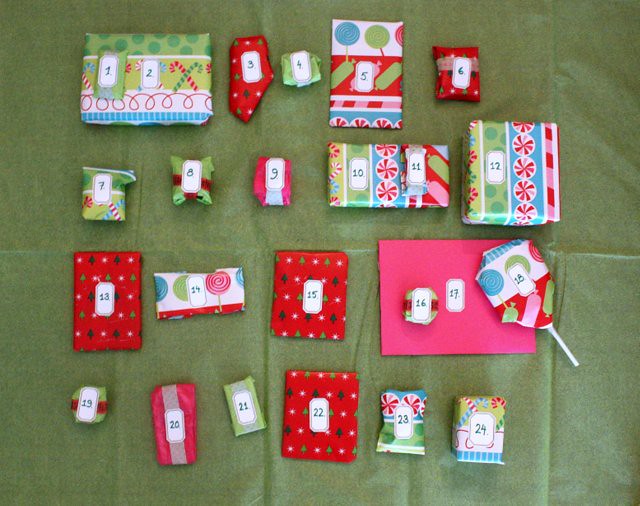
Best thing ever!
These photos are from a few years ago... I can't really share this years calenders so I won't ruin the surprise!
Do you have a calender for this year? What kind?
Saturday, December 21, 2013
Cutting, gluing, creating
It's been a long while since I've done anything really creative. I'm starting to realize that making something, even if it's small, helps fuel more creativity.
I haven't written many letters recently. I haven't made any paper crafts.
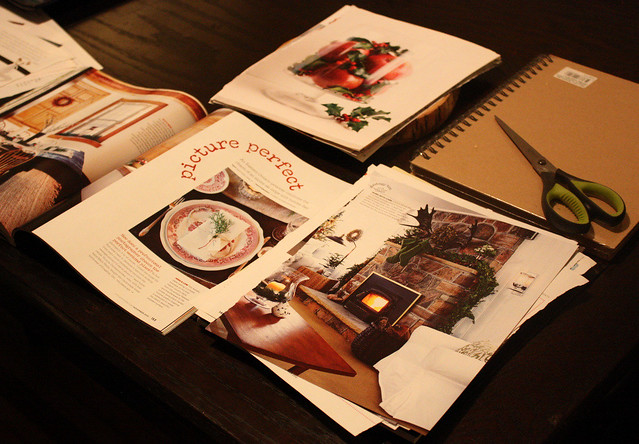
The longer it's been, the harder it is to get back to it. I feel like this lack of creative space, both physical and mental, makes it hard for me to even write.
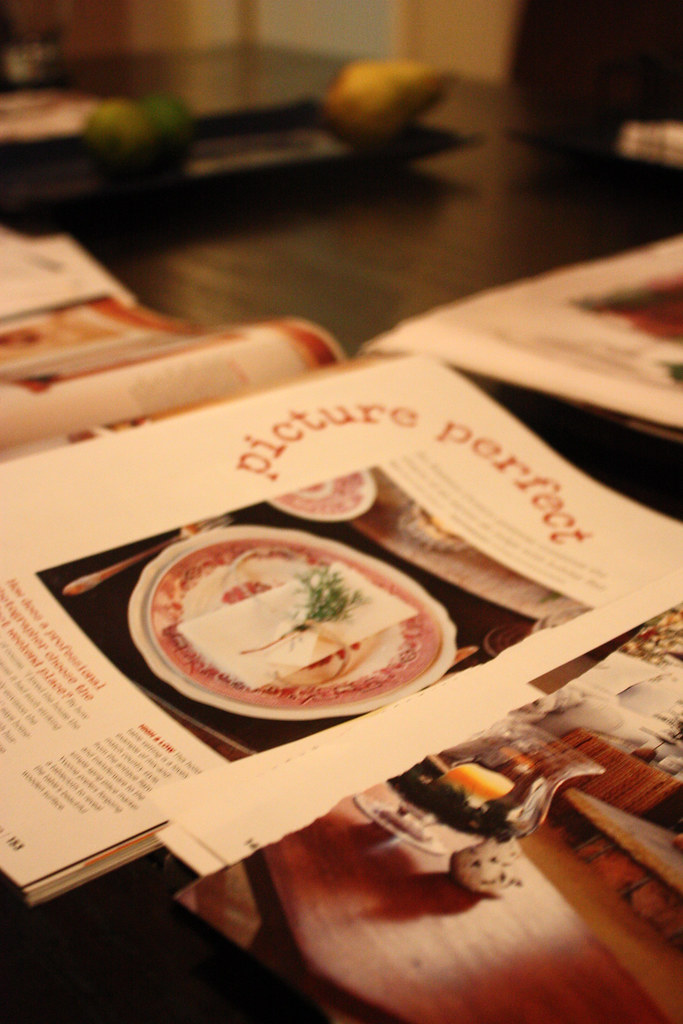
To help alleviate the distinct need for creating things in my life, I needed to start somewhere. The easiest and most useful task as to start going through the few magazines I still have. Ripping out pages with images I like will hopefully help with the creative rut.
Next step, start adding them into a notebook. I'm creating a Christmas notebook to help me get into the Christmas spirit.
What do you do when you feel you've been stripped of your creativity?
Thursday, December 12, 2013
The tree is here!
If you've followed my blog for a while now (or if you know me in real life) you know that I really, really like Christmas. Every year I put the tree up the first weekend of December and try to add a few other decorative touches for my home.
This year it so happened that our move was scheduled on December 1st. Then we had to wait of our furniture and other things to arrive, so I only got the tree up two days ago.
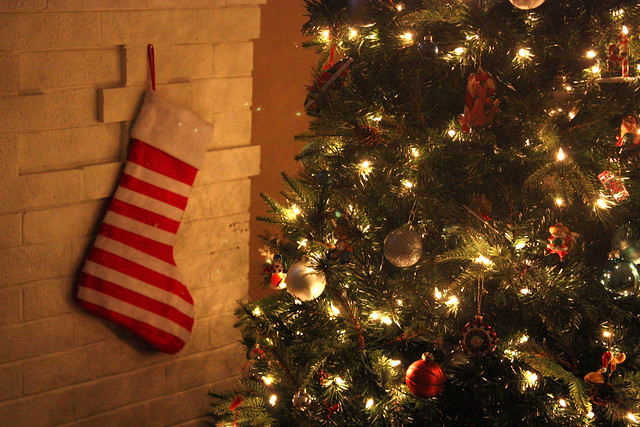
I love the fireplace. It was just calling for a couple of stockings. I have a few more ideas how to decorate the fireplace (hopefully) without going overboard with it.
I will take more photos, but there are still some boxes around. I do have a few other decorative things to put up as well. I'll share some more photos once I have a better handle of the place.
Do you have decorations up yet? Will you decorate your home?
Monday, January 7, 2013
Monday Mail
We're almost back to normal now! At least when it comes to Monday mail posts... Christmas and the blizzard we got messed up the regular postal schedule and I still got some holiday cards early last week. So, this is (hopefully) the last week with a mail love post that's a tad Christmassy and all over the place.
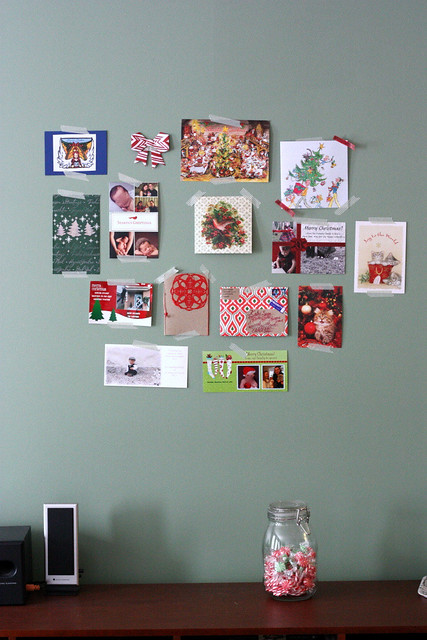
Before we get into more detailed photos of the outgoing and incoming mail, I wanted to show you a collection of incoming holiday mail. I wanted to display the cards we got, so I taped them to the wall in the living room. I think the display turned out awesome and I don't see why I wouldn't do this with regular mail too... Maybe not in the living room, but I think it would look fun next to my work space.
And onwards to the mail...
Outgoing
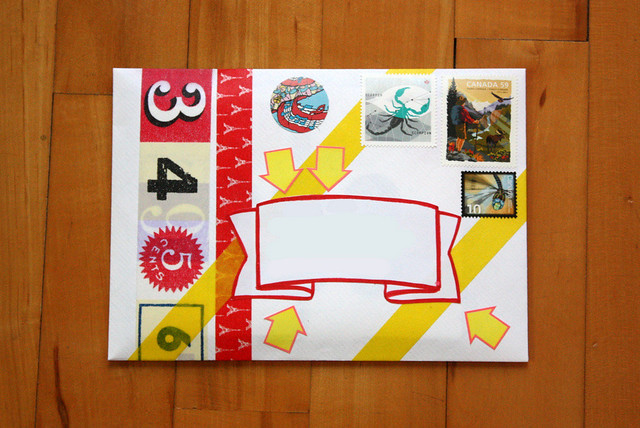
Another one of my brightly colored, all over the place pieces of mail. Sometimes I just feel like adding everything on an envelope.
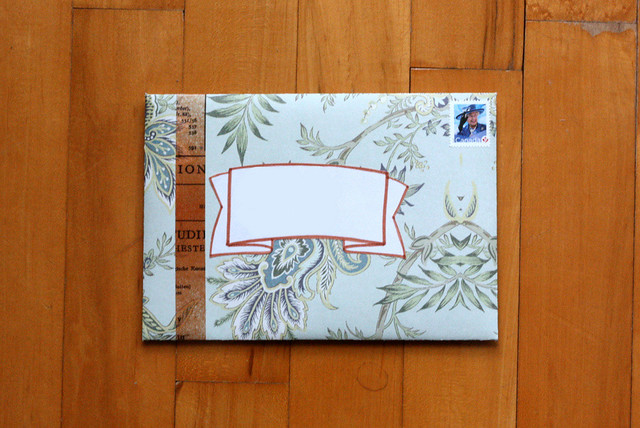
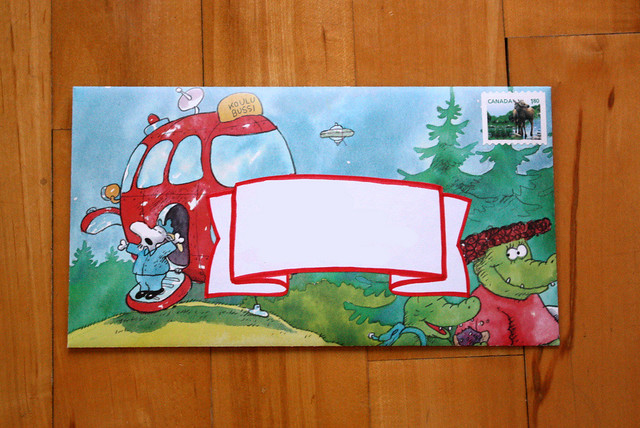 Other times simple is better. The top one is made from a piece of drawer liner, so it smells like lilies and the second one is made from a book page.
Incoming
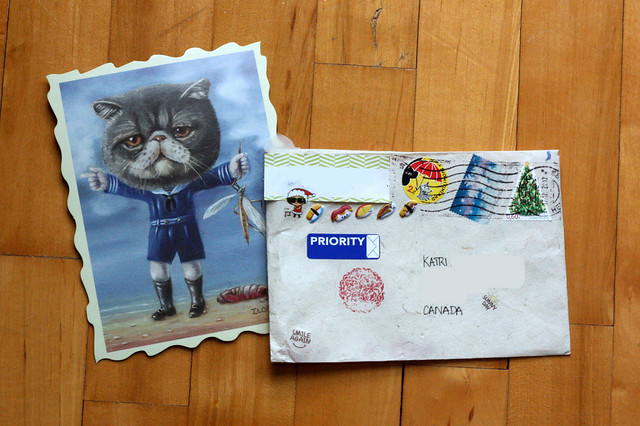 With all sorts of things coming in the mail, I wanted to share the few that aren't for Christmas. A cat postcard from an art exhibit and a letter. The envelope has puffy sushi stickers... Pretty awesome. Thank you!
So, have you returned to regular mailing?
Before we get into more detailed photos of the outgoing and incoming mail, I wanted to show you a collection of incoming holiday mail. I wanted to display the cards we got, so I taped them to the wall in the living room. I think the display turned out awesome and I don't see why I wouldn't do this with regular mail too... Maybe not in the living room, but I think it would look fun next to my work space.
Another great use for washi tape!
And onwards to the mail...
Outgoing

Another one of my brightly colored, all over the place pieces of mail. Sometimes I just feel like adding everything on an envelope.

 Other times simple is better. The top one is made from a piece of drawer liner, so it smells like lilies and the second one is made from a book page.
Incoming
 With all sorts of things coming in the mail, I wanted to share the few that aren't for Christmas. A cat postcard from an art exhibit and a letter. The envelope has puffy sushi stickers... Pretty awesome. Thank you!
So, have you returned to regular mailing?
Sunday, January 6, 2013
Writing instruments
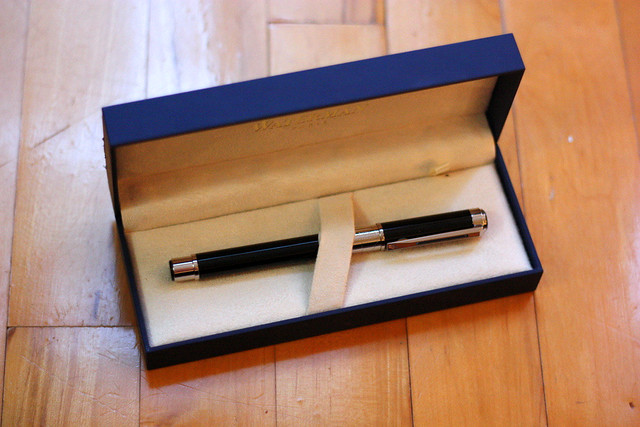
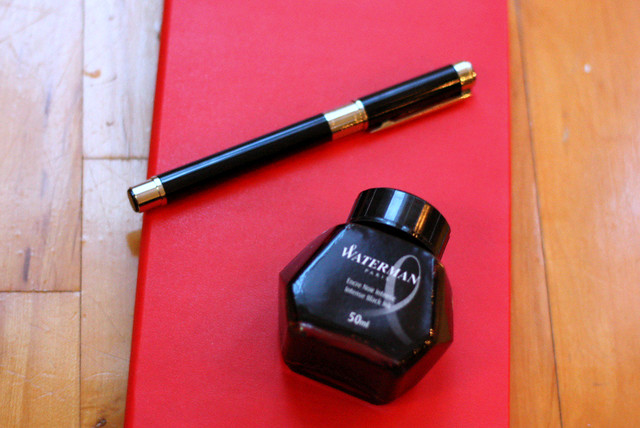
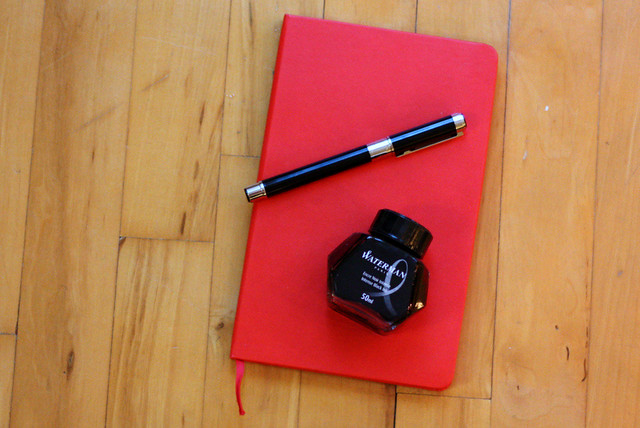 Chris got me an awesome Christmas present. I'm so excited! it's a Waterman fountainpen!
It's so pretty! And it writes so amazingly smooth. I'm still getting used to it, so I'm pretty sure it'll take me a little while before I can really see and feel the full benefits of such an amazing pen, but I'm already sold.
I got two different kinds of ink cartridges, one that was prefilled, which I'm trying first and one that I can fill myself. He even got me the ink. It feels pretty awesome to have a bottle of ink on my desk. In all honesty, I can see this ending badly, with a full bottle of ink and with me being the klutz that I am... Well, I'll just be careful. And try things out with this prefilled ink cartridge first.
So, how's your Sunday so far?
Sunday, December 30, 2012
The Year in Review - part 2 of 2012
You can see the first half of 2012 in the post below. Here's the recap of the second half:

In July we had visitors staying with us and we were wandering around town all times of the day. We went to see fireworks and spent a lot of time at Jean Talon Market. Brinner made an appearance at the McGill university and I made some great finds at the thrift stores again.
July was a month of bridal showers, I attended one and helped organizing another. I made shower favors for the second one. I suffered an identity crisis and saw the Muppets live.

In August I spent a lot more time with wedding related activities. I was asked to photograph a Nikkah ceremony, I showed some details from the shower I helped organize, a few of us girls took the bride to be to a relaxing spa getaway in lieu of a bachelorette party and I went dress shopping, but came home with the most beautiful shoes in the world.
Chris and I spend a weekend in Quebec City, walking around and eating well. I fell in love with books (again!), learned how to make granola bars and went bonkers ordering Korean stickers from eBay.

September felt long and scattered. There were exciting things like being featured in 365 magazine and finally finding that one elusive item I've been looking for a long time. It was also the month were George got sick and I lost my creative groove. I tried different approaches to creating, starting from painting the bedroom and trying my hand at collages. I baked cookies, killed zombies, watched an amazing documentary and talked about books. A lot.
When September was coming to a close I geeked out with friends and finally started getting creative again.
October was a month of big days. It started right off the bat with my nephew Ryan being born on October 1st. Then the second of the weddings for this year got under way on Thanksgiving weekend, this is the one where both Chris and I were in the wedding party. And the party just continued on October 10th where Hipstercurious turned 1. I also discovered some ancient Egyptian artifacts and started employing complex vernacular to substantiate my intelligence.
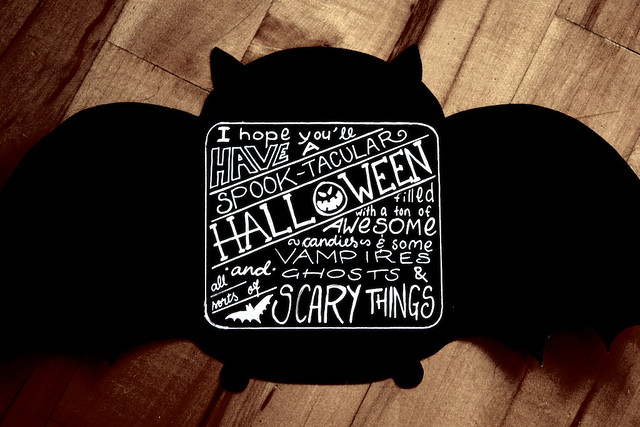
As all the celebrations were done, I started preparing for Halloween. We carved a pumpkin that became Evil-Bob, I discussed costumes and made a bat card tutorial.
I started November with a better plan for the blog, followed by an unsuccesful hunt for discounted Halloween candy. I was over the moon to be featured in the Discover Paper Holiday guide and that fueled my creative endeavors. I started making a ton of one of a kind ornaments for the December fairs. I found some beautiful vintage ornaments and made a DIY advent calendar tutorial that I know at least one person found inspiring.
I enjoyed the dark nights, said goodbye to fall and welcomed winter.
Chris and I set a new high score and celebrated the second anniversary of getting hitched in Vegas.
December was awesome in more ways than one. Obviously because of Christmas, but also because of two crafts fairs, Old Skool Crafts and Puces Pop. Besides that, my work was featured in two major places; Urban Expressions and my first print magazine feature, Koto Living.
We got a bit of snow first and then a whole lot more, which really allowed me to stay in and make some awesome DIY projects, such as a vintage ornament wreath, a winter scene complete with a plastic deer and of course some marshmallow chocolate pops, all with tutorials of course. I shared some details about my tree and a peek at my home.
2012 was an awesome year. On a more personal note, it was unexpected in many ways, but definitely fulfilling in others. Thanks to my blog, I learned new skills and made some new friends in Laura, Jess and Mary. I had a successful year with Brinner and developed in leaps and bounds when it come to running my own business.
I'm still not quite done with finishing off this year and I have tons and tons of ideas and plan for the next. Stay tuned!
What were the highlights of your 2012?
July

In July we had visitors staying with us and we were wandering around town all times of the day. We went to see fireworks and spent a lot of time at Jean Talon Market. Brinner made an appearance at the McGill university and I made some great finds at the thrift stores again.
July was a month of bridal showers, I attended one and helped organizing another. I made shower favors for the second one. I suffered an identity crisis and saw the Muppets live.
August

In August I spent a lot more time with wedding related activities. I was asked to photograph a Nikkah ceremony, I showed some details from the shower I helped organize, a few of us girls took the bride to be to a relaxing spa getaway in lieu of a bachelorette party and I went dress shopping, but came home with the most beautiful shoes in the world.
Chris and I spend a weekend in Quebec City, walking around and eating well. I fell in love with books (again!), learned how to make granola bars and went bonkers ordering Korean stickers from eBay.
September

September felt long and scattered. There were exciting things like being featured in 365 magazine and finally finding that one elusive item I've been looking for a long time. It was also the month were George got sick and I lost my creative groove. I tried different approaches to creating, starting from painting the bedroom and trying my hand at collages. I baked cookies, killed zombies, watched an amazing documentary and talked about books. A lot.
When September was coming to a close I geeked out with friends and finally started getting creative again.
October

October was a month of big days. It started right off the bat with my nephew Ryan being born on October 1st. Then the second of the weddings for this year got under way on Thanksgiving weekend, this is the one where both Chris and I were in the wedding party. And the party just continued on October 10th where Hipstercurious turned 1. I also discovered some ancient Egyptian artifacts and started employing complex vernacular to substantiate my intelligence.
As all the celebrations were done, I started preparing for Halloween. We carved a pumpkin that became Evil-Bob, I discussed costumes and made a bat card tutorial.
November
[I think this is my favourite photo of the year]
I started November with a better plan for the blog, followed by an unsuccesful hunt for discounted Halloween candy. I was over the moon to be featured in the Discover Paper Holiday guide and that fueled my creative endeavors. I started making a ton of one of a kind ornaments for the December fairs. I found some beautiful vintage ornaments and made a DIY advent calendar tutorial that I know at least one person found inspiring.
I enjoyed the dark nights, said goodbye to fall and welcomed winter.
Chris and I set a new high score and celebrated the second anniversary of getting hitched in Vegas.
December
December was awesome in more ways than one. Obviously because of Christmas, but also because of two crafts fairs, Old Skool Crafts and Puces Pop. Besides that, my work was featured in two major places; Urban Expressions and my first print magazine feature, Koto Living.
We got a bit of snow first and then a whole lot more, which really allowed me to stay in and make some awesome DIY projects, such as a vintage ornament wreath, a winter scene complete with a plastic deer and of course some marshmallow chocolate pops, all with tutorials of course. I shared some details about my tree and a peek at my home.
2012 was an awesome year. On a more personal note, it was unexpected in many ways, but definitely fulfilling in others. Thanks to my blog, I learned new skills and made some new friends in Laura, Jess and Mary. I had a successful year with Brinner and developed in leaps and bounds when it come to running my own business.
I'm still not quite done with finishing off this year and I have tons and tons of ideas and plan for the next. Stay tuned!
What were the highlights of your 2012?
Saturday, December 29, 2012
Welcome to my place!
I realized that I've never really shown much of my home here in my blog. I felt like now would be a good time, with the decorations still up. Plus, I obviously cleaned for the holidays. There have been some glimpses so far, but nothing much. I'm not planning on making an full on tour either, but a few details with the holiday decor.
The entryway got a ton of ornaments. I ended up hanging the wreath I made on the wall, instead of the door just because of the delicate glass ornaments. the entry to our condo is on the left and there's a fairly large closet on the right. That's where my shoes live. I'm standing in the living room taking the photo.
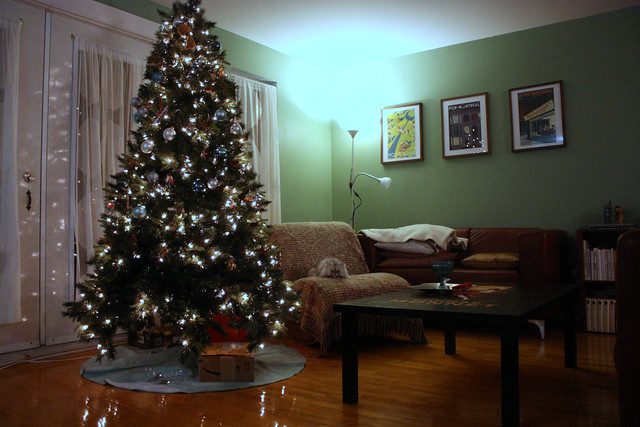
If I turn around on the exact spot where the previous photo is taken, you'll see my living room. This particular photo is taken later in the evening as the light comes in directly from the french doors during the day. Those doors behind the tree open to the tiny French balcony I've mentioned before. The one I have my herbs and tomatoes on in the summer. On the left of this photo is the dining area and kitchen. The upstairs of the condo is open, except for a powder room and the office.
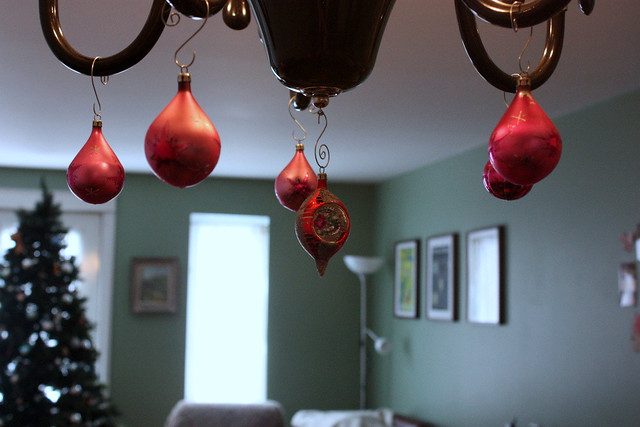 I added some ornaments to the chandelier over the dining table. Another place to hang the extra delicate ornaments from. Taking this photo I'm standing in my kitchen and facing the living room.
There aren't really any decorations in the office, but I do have another tree downstairs in the bedroom. The downstairs has the master bathroom and bedroom, some closet space and the laundry area. This is definitely more of a Scandinavian tree. More minimalistic with some definitely Scandinavian ornaments. When it comes to Christmas trees, I'm definitely the "more is more" type rather than the minimalistic Scandinavian.
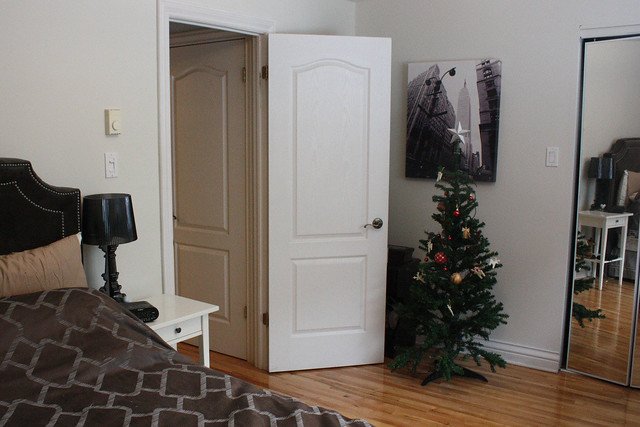 I took a few steps back from the tree to show you a bit more of the bedroom. The mirrored doors lead to the walk-in closet and the open door to a hallway with the washing machine, dryer and extra storage and ends next to the bathroom and the stairs leading back upstairs.
This is the room I painted while Chris was in Vegas earlier this year. It used to be a dark eggplant colour.
The bedroom is at street level, so the cats love sitting on the window sill. This is Gossamer trying to blend in with his surroundings. It's a bit hard to explain the setup, since you actually come into the condo from the top floor and still have a few rooms at the bottom which is not a basement. Well, it might not make sense as an explanation, but it works in reality. I would have to say that's the important part.
I might show some more details and photos from the rest of the rooms later. I love coming up with fun little additions to our place, so there will definitely be neat things to share. More about that next year!
The entryway got a ton of ornaments. I ended up hanging the wreath I made on the wall, instead of the door just because of the delicate glass ornaments. the entry to our condo is on the left and there's a fairly large closet on the right. That's where my shoes live. I'm standing in the living room taking the photo.

If I turn around on the exact spot where the previous photo is taken, you'll see my living room. This particular photo is taken later in the evening as the light comes in directly from the french doors during the day. Those doors behind the tree open to the tiny French balcony I've mentioned before. The one I have my herbs and tomatoes on in the summer. On the left of this photo is the dining area and kitchen. The upstairs of the condo is open, except for a powder room and the office.
 I added some ornaments to the chandelier over the dining table. Another place to hang the extra delicate ornaments from. Taking this photo I'm standing in my kitchen and facing the living room.
There aren't really any decorations in the office, but I do have another tree downstairs in the bedroom. The downstairs has the master bathroom and bedroom, some closet space and the laundry area. This is definitely more of a Scandinavian tree. More minimalistic with some definitely Scandinavian ornaments. When it comes to Christmas trees, I'm definitely the "more is more" type rather than the minimalistic Scandinavian.
 I took a few steps back from the tree to show you a bit more of the bedroom. The mirrored doors lead to the walk-in closet and the open door to a hallway with the washing machine, dryer and extra storage and ends next to the bathroom and the stairs leading back upstairs.
This is the room I painted while Chris was in Vegas earlier this year. It used to be a dark eggplant colour.
The bedroom is at street level, so the cats love sitting on the window sill. This is Gossamer trying to blend in with his surroundings. It's a bit hard to explain the setup, since you actually come into the condo from the top floor and still have a few rooms at the bottom which is not a basement. Well, it might not make sense as an explanation, but it works in reality. I would have to say that's the important part.
I might show some more details and photos from the rest of the rooms later. I love coming up with fun little additions to our place, so there will definitely be neat things to share. More about that next year!
Tuesday, December 25, 2012
The tree
Happy Holidays! Merry Christmas!
I hope you all have a wonderful, fantastical, phenomenal and awesome-tastic holiday time!
Sunday, December 23, 2012
Chocolate Marshmallow pops - Easy candy-making
Since I've had candy on the brain since Friday, I gave in yesterday and decided to make some. Well, "make" is maybe an overstatement. I more like combined a few things and thought they came up pretty impressive. I decided to make marshmallow-chocolate pops.
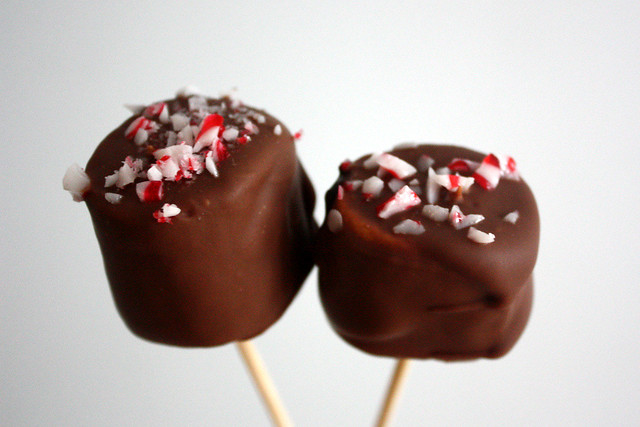
These are really easy and fast to make. The only part that takes a while is the cooling down phase afterwards. So, I recommend making them a few hours before you're serving them. I made mine in the afternoon and then went to dinner. They were perfect by the time I got back home.
Here's what you need:
1 bag of large marshmallows
Chocolate, I used three different kind; 200g milk, 200g 70% cocoa dark, and 100g 70% cocoa dark with orange peel. The amounts are not too specific, but I found the chocolate in 100g bars, so I used 5 bars for the entire batch.
a few peppermint candies, these go a long way crushed. I think I used 4 or 5.
and wooden skewers
For equipment you'll need a small cooking pot and a small bowl that fits on top of the cooking pot as well as some glasses or mugs to stand the pops up in. Make sure your bowl can stand the heat (or tell it to leave the kitchen. heheheee. I think I'm hilarious).
Melt your chocolate in the bowl, placed over the pot filled with water. Once the water starts to boil, it'll slowly heat the bowl and melt the chocolate. While that is melting, prepare your marshmallows by putting them on the sticks. I used regular wooden skewers that I cut in half (and by "I" I mean Chris). If they splinter easily, make sure you only insert the non-cut end into the marshmallow. Prepare your topping by crushing peppermint candy (I used the traditional round ones, but if you have some candy canes, that works great too) into small pieces.
You could use a whole lot of different toppings. Maybe some more chocolate, finely grated. Different candies, like M&Ms or other colorful candy drops. I'm sure different kinds of nuts would work really well. The point is to just add another texture and some color on to the pops.
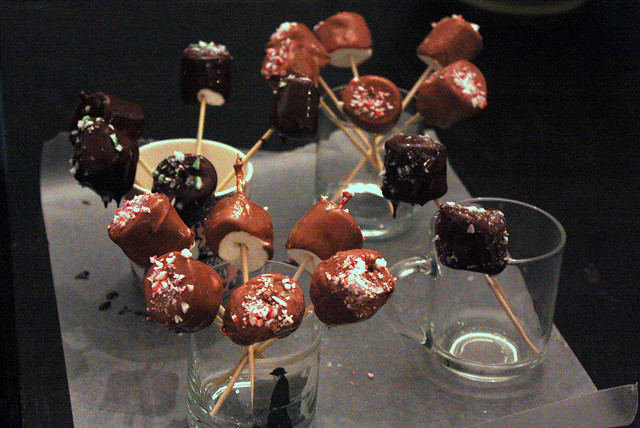 Once the chocolate has melted, dip the marshmallow into the chocolate, twirl it around and gently knock the skewer onto the side of the bowl to get rid of the excess chocolate (if you don't, there's going to be a whole lot more cleaning to do afterwards. Add your topping while the chocolate is still warm and place the pop into a drinking glass or a mug. I placed 6 of the pops into one glass, that way there's enough room for them to cool down without touching the others. (They stick to each other if the chocolate is still soft) Once you're done, I'd recommend placing them in the fridge. The chocolate shell hardens better in the cold.
And you're done!
You can eat them as they are or use them as hot chocolate stirrers.

These are really easy and fast to make. The only part that takes a while is the cooling down phase afterwards. So, I recommend making them a few hours before you're serving them. I made mine in the afternoon and then went to dinner. They were perfect by the time I got back home.
Here's what you need:
1 bag of large marshmallows
Chocolate, I used three different kind; 200g milk, 200g 70% cocoa dark, and 100g 70% cocoa dark with orange peel. The amounts are not too specific, but I found the chocolate in 100g bars, so I used 5 bars for the entire batch.
a few peppermint candies, these go a long way crushed. I think I used 4 or 5.
and wooden skewers
For equipment you'll need a small cooking pot and a small bowl that fits on top of the cooking pot as well as some glasses or mugs to stand the pops up in. Make sure your bowl can stand the heat (or tell it to leave the kitchen. heheheee. I think I'm hilarious).
Melt your chocolate in the bowl, placed over the pot filled with water. Once the water starts to boil, it'll slowly heat the bowl and melt the chocolate. While that is melting, prepare your marshmallows by putting them on the sticks. I used regular wooden skewers that I cut in half (and by "I" I mean Chris). If they splinter easily, make sure you only insert the non-cut end into the marshmallow. Prepare your topping by crushing peppermint candy (I used the traditional round ones, but if you have some candy canes, that works great too) into small pieces.
You could use a whole lot of different toppings. Maybe some more chocolate, finely grated. Different candies, like M&Ms or other colorful candy drops. I'm sure different kinds of nuts would work really well. The point is to just add another texture and some color on to the pops.
 Once the chocolate has melted, dip the marshmallow into the chocolate, twirl it around and gently knock the skewer onto the side of the bowl to get rid of the excess chocolate (if you don't, there's going to be a whole lot more cleaning to do afterwards. Add your topping while the chocolate is still warm and place the pop into a drinking glass or a mug. I placed 6 of the pops into one glass, that way there's enough room for them to cool down without touching the others. (They stick to each other if the chocolate is still soft) Once you're done, I'd recommend placing them in the fridge. The chocolate shell hardens better in the cold.
And you're done!
You can eat them as they are or use them as hot chocolate stirrers.
Friday, December 21, 2012
Friday Inspiration - Holiday Candy
I woke up this morning thinking about candy. This is not as rare of an occurrence as I would like to say it is, but today was special. I wanted to make candy.
A number of years ago I made candy myself as part of my Christmas presents that year. I made a selection of chocolates. It's been a while since I've done that for Christmas, but I did make some for Chris earlier this year.
I just find the holidays the prime time for candy. Well, I suppose most people do. I've been thinking about making something fun myself, but I don't have any fancy equipment like a candy thermometer or candy molds or other stuff like that. I leave the more delicate operations to people who know what they are doing in the kitchen. (Like my sister-in-law, she made this delicious fudge last time I was over there. Holy cow, man. It was amazing)
Anyhow, point being, I'm really tempted to make something fun but fairly straightforward. I have a busy day ahead, so not sure how much time I'll have, but let's keep our fingers crossed...
Do you make candy yourself? What's your go-to recipe?
Thursday, December 20, 2012
DIY Vintage Ornament wreath
Have you seen a wreath made entirely from Christmas tree ornaments? Here's how to make one!
I've been wanting to make an ornament wreath for a long time. I even scoured thrift stores for fun ornaments for it. I had everything ready, but I only got the time to try it out yesterday.
It took some trial and error, not to mention paper thin glass shards from a shattering glass ornament, but I am very happy with how it turned out.
It wasn't actually all that hard to make, although it took a while. If you want to make one it'll probably be much faster that mine was, since I'm hoping to save you some of the error parts from the experiment. To make this you'll need a wicker wreath form, ornaments, ribbon, super glue and twist ties. Make sure you have plenty of ornaments, I ended up using about 60 and I could've easily fit more of them.
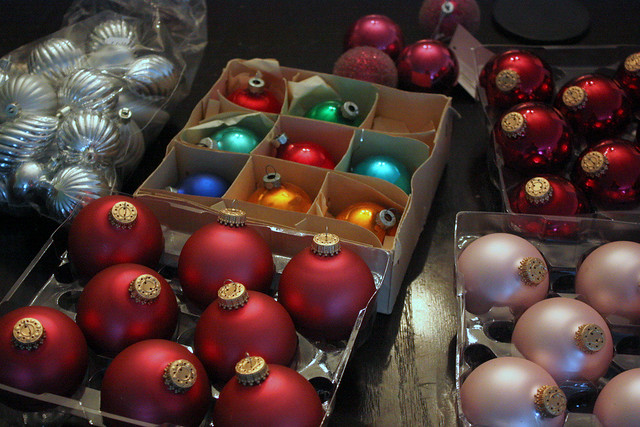 Before you do anything else, check that the ornaments are securely attached to the loops on top! I can't emphasize this enough. If you're using vintage ornaments, the wires which they are supposed to be hung from are most likely very loose. Use a few drops of superglue under each hangy-thingy (that's the official term) to make sure they are secure. Trust me, it'll be worth it. If you want to make this and don't really care what material the ornaments are, go with plastic. Seriously, they are much more secure for the purpose and won't shatter even if you drop them!
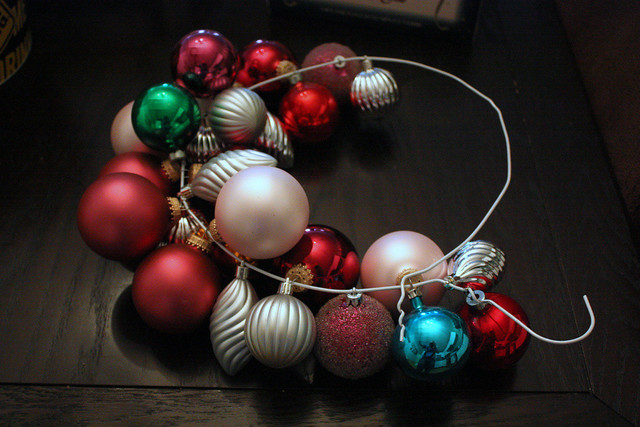
I was originally going to build my wreath on a wire hanger (obviously twisted into a circle) but it didn't really work out the way I wanted. First, I would've needed a whole lot more ornaments and somehow they just didn't seem to settle nicely. I understand that if I'd had a ton more ornaments, this would've probably been the best way.
I had this wicker wreath I was planning on using to another project, but decided to try it out after realizing I am not going to be able to finish the wire version. I felt like, although gluing the ornaments onto the the wreath might have been the most convenient, it was not worth the risk. Gluing round shapes to other round shapes is not easy and, most likely, not permanent. Having 60 vintage glass ornaments falling on the floor was not an appealing scenario to me, so I had to come up with something else. Enter twist ties.
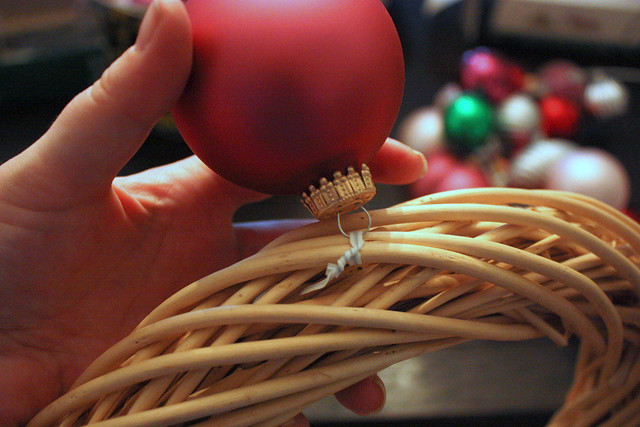
Turns out it was a great idea! Tie the ornaments on, but leave the ties loose enough so you can move them around. Perfect solution.
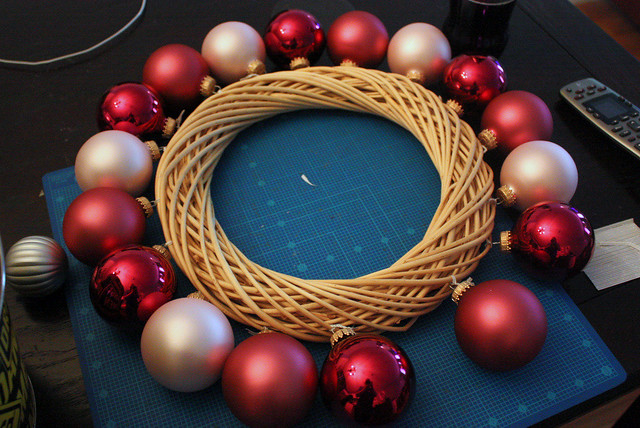
I started from the outer edges but soon realized I don't actually need to be that organized. Start tying the ornaments on and then just slide them next to each other on the wreath. It's easy even if a bit time consuming. Leave a little bit of the wreath exposed if you want to hang this up, that's where you can tie the ribbon to hang it with.
And that's it. In all honesty, it takes a little while to get a hang of how to tie the ornaments and how to place them, but once you got it, it's not hard. It takes a bit of patience though, but it's well worth in the end. At least I think so, I really like the wreath and am kinda tempted to make more...
What do you think? Are you going to make one? I'd love to see photos if you end up making one!
I've been wanting to make an ornament wreath for a long time. I even scoured thrift stores for fun ornaments for it. I had everything ready, but I only got the time to try it out yesterday.
It took some trial and error, not to mention paper thin glass shards from a shattering glass ornament, but I am very happy with how it turned out.
It wasn't actually all that hard to make, although it took a while. If you want to make one it'll probably be much faster that mine was, since I'm hoping to save you some of the error parts from the experiment. To make this you'll need a wicker wreath form, ornaments, ribbon, super glue and twist ties. Make sure you have plenty of ornaments, I ended up using about 60 and I could've easily fit more of them.
 Before you do anything else, check that the ornaments are securely attached to the loops on top! I can't emphasize this enough. If you're using vintage ornaments, the wires which they are supposed to be hung from are most likely very loose. Use a few drops of superglue under each hangy-thingy (that's the official term) to make sure they are secure. Trust me, it'll be worth it. If you want to make this and don't really care what material the ornaments are, go with plastic. Seriously, they are much more secure for the purpose and won't shatter even if you drop them!
I was originally going to build my wreath on a wire hanger (obviously twisted into a circle) but it didn't really work out the way I wanted. First, I would've needed a whole lot more ornaments and somehow they just didn't seem to settle nicely. I understand that if I'd had a ton more ornaments, this would've probably been the best way.
I had this wicker wreath I was planning on using to another project, but decided to try it out after realizing I am not going to be able to finish the wire version. I felt like, although gluing the ornaments onto the the wreath might have been the most convenient, it was not worth the risk. Gluing round shapes to other round shapes is not easy and, most likely, not permanent. Having 60 vintage glass ornaments falling on the floor was not an appealing scenario to me, so I had to come up with something else. Enter twist ties.

Turns out it was a great idea! Tie the ornaments on, but leave the ties loose enough so you can move them around. Perfect solution.

I started from the outer edges but soon realized I don't actually need to be that organized. Start tying the ornaments on and then just slide them next to each other on the wreath. It's easy even if a bit time consuming. Leave a little bit of the wreath exposed if you want to hang this up, that's where you can tie the ribbon to hang it with.
And that's it. In all honesty, it takes a little while to get a hang of how to tie the ornaments and how to place them, but once you got it, it's not hard. It takes a bit of patience though, but it's well worth in the end. At least I think so, I really like the wreath and am kinda tempted to make more...
What do you think? Are you going to make one? I'd love to see photos if you end up making one!
Wednesday, December 19, 2012
On the crafting desk
And by "crafting desk" I mean all over the place. I just wanted to share what I'm working on right now.
More details soon!
More details soon!
Monday, December 17, 2012
Regular life and mail
I'm drinking my morning coffee and trying to wrap my head around the last few weeks. It's been pretty crazy but I had an awesome time. So, first things first:
Thank you everyone who came by the craft fairs! Thank you to the organizers and my fellow sellers! It was great!
Now, I'm trying to figure out what I should be doing next. First priority should definitely be getting rid of the little paper snippets that are floating around our place. I've been frantically making things, so there's definitely paper everywhere. Also, I need to shake this compulsion to make something constantly. I feel a tad weird now when I'm not making anything.
We're a week away from Christmas, so I need to get organized for Christmas preparations as well. I'd like to give you an example of what I need to do, but I'm not quite sure right now. This is a prime example of where my head's been for the last few weeks.
I've missed a few weeks of Mail Love, so I wanted to share a few things today. Admittedly though, I've received some great mail and sent a whole lot of outgoing, but I didn't actually take photos... So, all I can do right now is one photo of each.
Outgoing
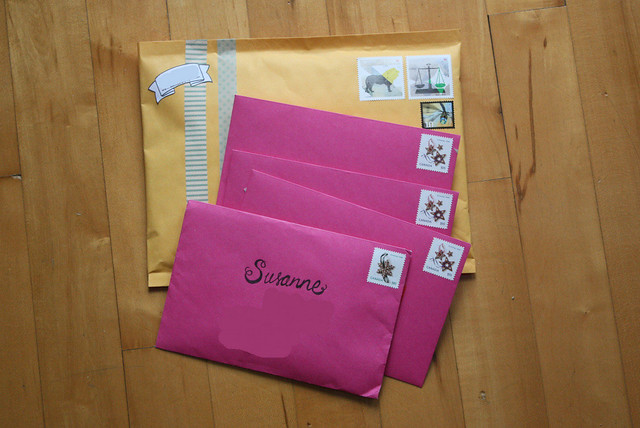
This is a small sample of my outgoing mail. There's actually been quite a bit recently. I will run out of those hot pink envelopes shortly and I think I'm oddly going to miss them...
Incoming
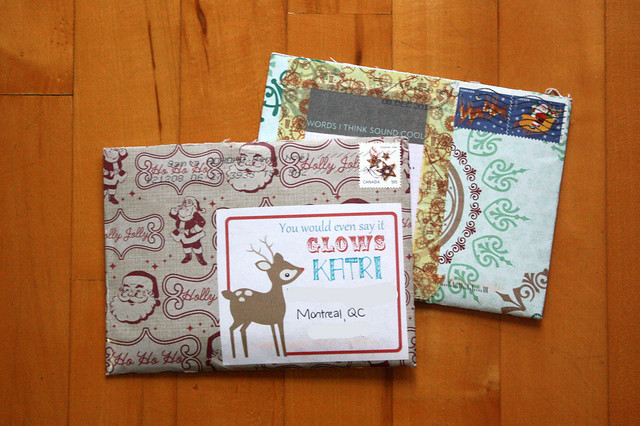
A letter from Laura and another from Jess. What a two days that was. I took way too long to write to both, yet here they are, swift replies again. I won't take as long this time. I promise!
On a side note, I'm trying to decide what to do about this outgoing/incoming post. It wasn't really supposed to be a weekly thing, but it became one almost without me noticing. I'm not really sure if I should continue it in the next year, or maybe just make an occasional post. I know I have quite a few snailmailing readers, so what do you guys think?
Thank you everyone who came by the craft fairs! Thank you to the organizers and my fellow sellers! It was great!
Now, I'm trying to figure out what I should be doing next. First priority should definitely be getting rid of the little paper snippets that are floating around our place. I've been frantically making things, so there's definitely paper everywhere. Also, I need to shake this compulsion to make something constantly. I feel a tad weird now when I'm not making anything.
We're a week away from Christmas, so I need to get organized for Christmas preparations as well. I'd like to give you an example of what I need to do, but I'm not quite sure right now. This is a prime example of where my head's been for the last few weeks.
I've missed a few weeks of Mail Love, so I wanted to share a few things today. Admittedly though, I've received some great mail and sent a whole lot of outgoing, but I didn't actually take photos... So, all I can do right now is one photo of each.
Outgoing

This is a small sample of my outgoing mail. There's actually been quite a bit recently. I will run out of those hot pink envelopes shortly and I think I'm oddly going to miss them...
Incoming

A letter from Laura and another from Jess. What a two days that was. I took way too long to write to both, yet here they are, swift replies again. I won't take as long this time. I promise!
On a side note, I'm trying to decide what to do about this outgoing/incoming post. It wasn't really supposed to be a weekly thing, but it became one almost without me noticing. I'm not really sure if I should continue it in the next year, or maybe just make an occasional post. I know I have quite a few snailmailing readers, so what do you guys think?
Friday, December 14, 2012
Friday Inspiration - Gingerbread Cookies
I'm thinking about cookies. Gingerbread cookies specifically. I'm preparing for the show, but here I am, wishing I'd have gingerbread cookies.
I used to love baking them, I'd do it every year for Christmas, but not so much now that I'm in Canada. In Finland every grocery store sells gingerbread dough, but I haven't seen it here. I could obviously make some myself, but I haven't exactly had the time recently.
I think I'll need to go spend more time in the store after the show is done... Or, assuming I have the time next week, I could look into making the dough myself. I think that would be awesome.
Do you have a good, and preferably easy, recipe for gingerbread cookies you could share with me?
On an interesting side note, I've come to realize a fundamental difference between Finnish and North American gingerbread cookies. I'm not talking about taste or consistency (although the North American are much thicker), but about the frosting. In Finland IF (not mandatory) you frost your cookies, they have a few decorative lines here and there. Like the face of a gingerbread man (two dots for eyes and a line for a mouth) or the buttons on his jacket (it so seems that globally the official gingerbread man attire is some sort of a coat or a jacket). Where as in North America the entire cookie seems to be covered in frosting. Ok, I get it, it's not like so everywhere, but in Finland I think that unless you are 5 or younger, covering your entire cookie with frosting is some kind of a faux pas.
I think I need to make these one day...
Monday, December 10, 2012
A few more days...
...and then I'll be at craft show number 2! That's right folks, I made into Puces Pop again! I'm so excited! Old Skool Crafts was a lot of fun and got me totally into a craft show mood.
Man, I love doing this!
Please be patient with me for the next week as my stock diminished at an unexpected rate last weekend. That means I am using every few minutes of free time making more items.
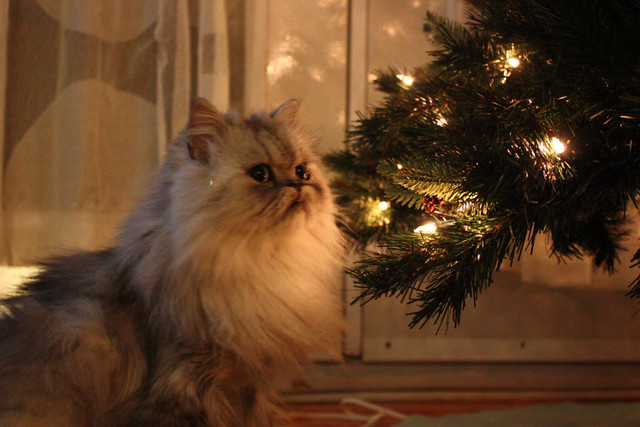
Today, I'll leave you with George, the Christmas Cat! (a.k.a overbite kitty)
Man, I love doing this!
Please be patient with me for the next week as my stock diminished at an unexpected rate last weekend. That means I am using every few minutes of free time making more items.

Today, I'll leave you with George, the Christmas Cat! (a.k.a overbite kitty)
Saturday, December 8, 2012
First craft show - ETA 1.5 hours
Here we go! As I write this the first craft fair of the season is only a few hours away. I'm having some coffee while going over my list. Compared to last year, this is much more pleasant... I did my first fair just about a year ago and was a whole lot more panicky than I am today. Right now, I'm very excited. I just love doing shows like this.
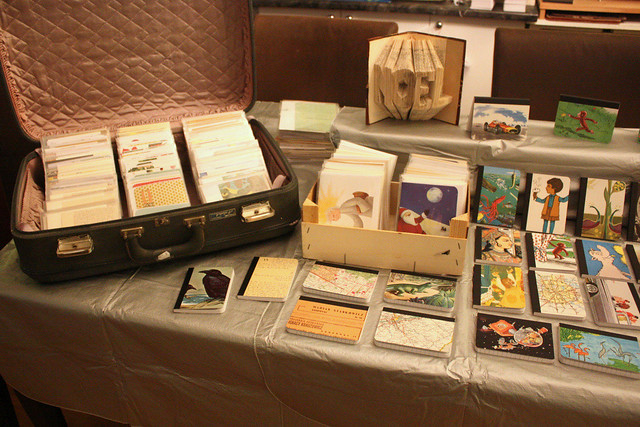
I wanted to show you a sneak peek of my trial setup on Thursday. I did make a few tweaks to the table, but this is basically what my table will look like.
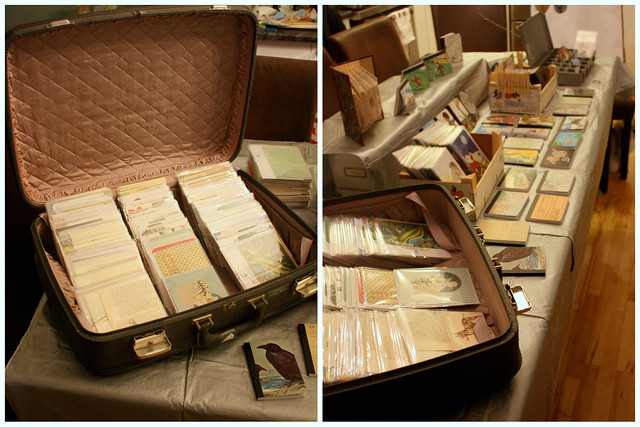
I'll show you more photos after!
Friday, December 7, 2012
Friday Inspiration
Since my first craft show of the year starts tomorrow, it's probably pretty obvious my head is filled with lists and last minute preparations for the show. I already have my table setup figured out, I tried it out last night, but it never hurts to browse around for those last minute ideas.
My table will definitely be more holiday themed this year. I wouldn't say it's all-out Christmass-y, but there's a definite holiday vibe to it. I'll show you some photos soon. I'm still trying to figure out if I should add some red to the table... Right now it's more shabby chic with silver table cloths and accents in unfinished wood, grey and metallic silver.
I'm tempted to bring out some of the vintage ornaments just to add more bling to the table. Not sure about that though... I guess I just have to see how it all comes together.
If you were shopping at a craft fair, would you like some extra embellishments on the table, or do you prefer the products alone?
Subscribe to:
Posts (Atom)

