Showing posts with label Tutorial. Show all posts

Friday, January 9, 2015

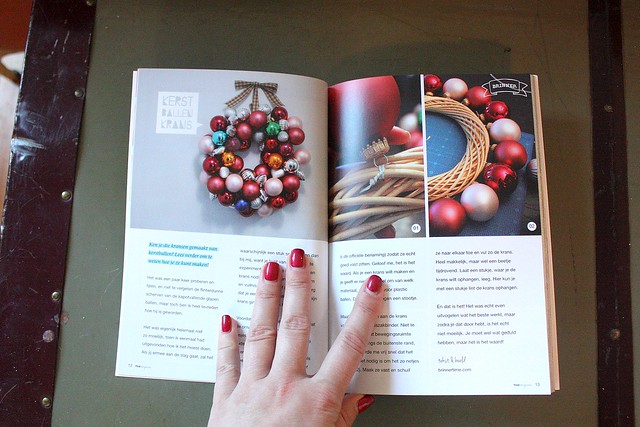
My article in Maak Magazine

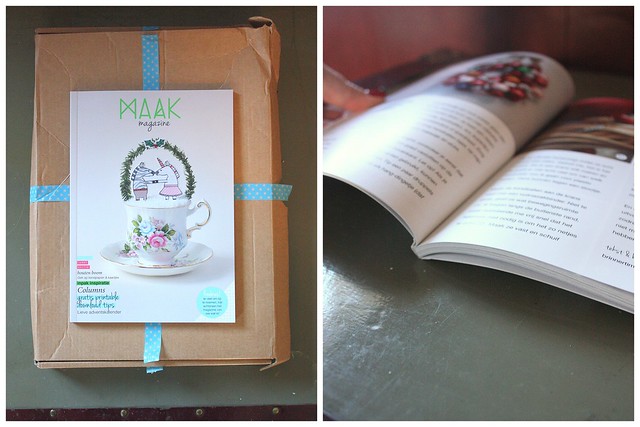
I've had a really hard time not telling you guys about this until now! My DIY vintage ornament wreath tutorial has been published in the Dutch craft magazine Maak Magazine! Woohoo!

My article was published in a Dutch craft magazine
The ladies behind the magazine sent me the page layout before and said I could share it, but I really wanted to wait until I had the actual magazine in my hands. I'm glad I did. The magazine is totally amazing!

My article was published in a Dutch craft magazine The quality of the magazine is so nice, even the paper feels great! And there's just so much cool stuff in it. I don't speak Dutch and understand only a little bit, so I can't follow the instructions written instructions. The photos, however, are amazing and give you a really good idea what the text says.

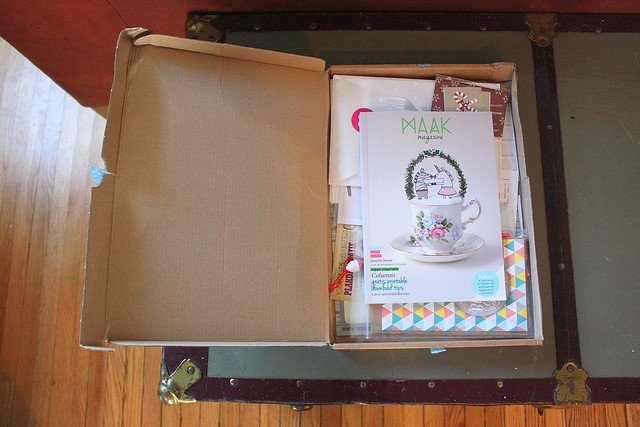
My article was published in a Dutch craft magazine I should mention that there are goodies that come with it... I was expecting maybe a postcard or a couple of stickers, but I was pleasantly surprised when I saw all this additional stuff! Many things were Christmas and New Years related, since this was the holiday edition, but there's a bunch of all-season goodies too! I did order a few other things as well, but I removed those from the box prior to taking the photo. All the other things are extra stationery surprises included with my order.

Please note that this is not a paid ad! I am super-excited to have my tutorial published, but I paid for a copy of the magazine myself. So, yeah, it's really that good!

Wednesday, October 8, 2014

Halloween DIY - Simple foldable Bat Cards 2.0

Since I already saw the Halloween sign, it's time to get a move on with the preparations!

I've been busy dying paper for some brand new tutorials and assembling some really nifty Halloween goodies for a giveaway! I'm also experimenting with some Halloween mail, which, of course, has put me in the snailmailing mood!

Over the last year or so, the readership of this blog has been steadily increasing, so I wanted to share a few improved tutorials from the Brinner past...It's time to fix some past wrongs that have been bugging me!

First up:
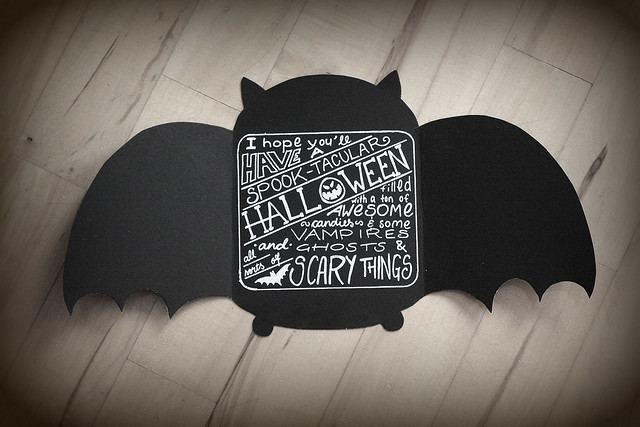
Halloween Bat cards
...Halloween bat cards!

I still love these! One of my all-time favorite Brinner tutorials!

This was the first one that was pinned multiple times on Pinterest and I actually got some feedback on. It was the one that kind of proved I was on the right track.

It was, however, way too complicated. I tracked my own process step-by-step but it didn't really translate into simple instructions. Now I feel like I am much better at this, so I re-wrote (and photographed) a new, much simpler way to make these!

(If you want to see the original CLICK HERE)

Bat card Tutorial You'll need

- Pen or pencil
- Scissors
- Ruler
- Two rectangle or square shaped items, one a bit smaller than the other. I used two postcards, but anything in that shape works, books, coasters, notepads, etc.
- Cardboard. I used a cereal box, like I often do. Any sturdier paper/cardboard works.

The above are for a template (you know how I like those, right?)

For the cards you'll also need

- Black card or paper (I used poster board which is a really nice, sturdy cardboard. Also, very cheap!)
- White (or other light/bright colored) pen (I like using a gel pen for this)
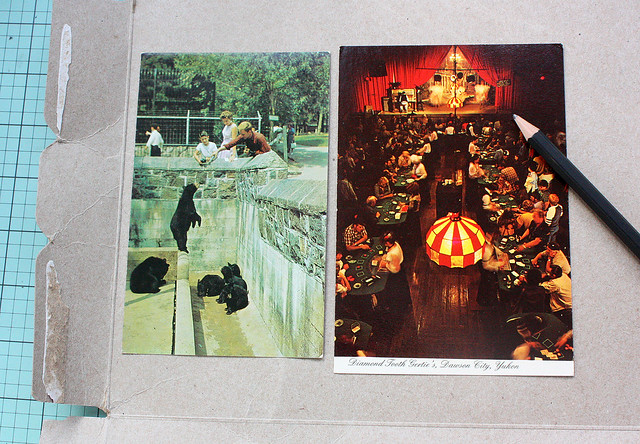
Bat card Tutorial Start by placing the larger rectangle in the middle of your cardboard, leaving enough space on both sides to fit the smaller rectangle.

Bat card Tutorial

Trace the large rectangle in the middle and the smaller one on both sides. Make sure the larger and the smaller rectangles are connected from one side. 

Bat card Tutorial

I traced them with a black pen so you can see exactly what I mean. 
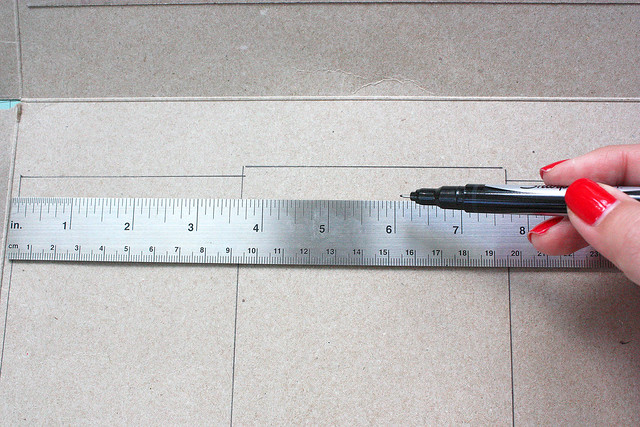
Bat card Tutorial Use the ruler to draw a line across all three rectangles about a half inch (or one centimeter) below the top of the smaller rectangles. Do this on the top and bottom. Check the photo below how your rectangles should look now.
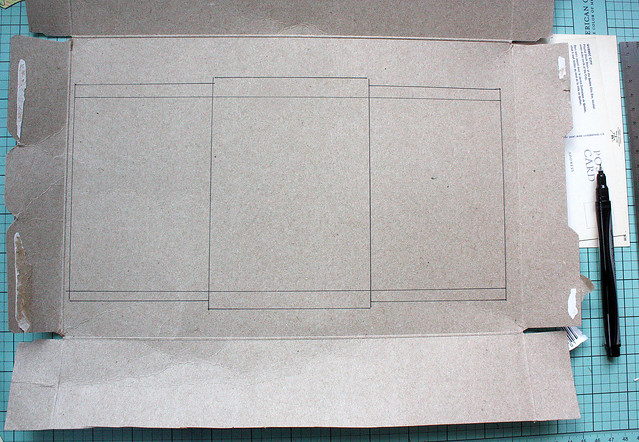
Bat card TutorialThe reason for the line is to help draw the extremities of the bat and keep everything in an easily foldable and manageable size. Don't draw anything outside the newly drawn lines, except for the bats ears and feet. Those are coming up next.

Now for some simple freehand drawing.
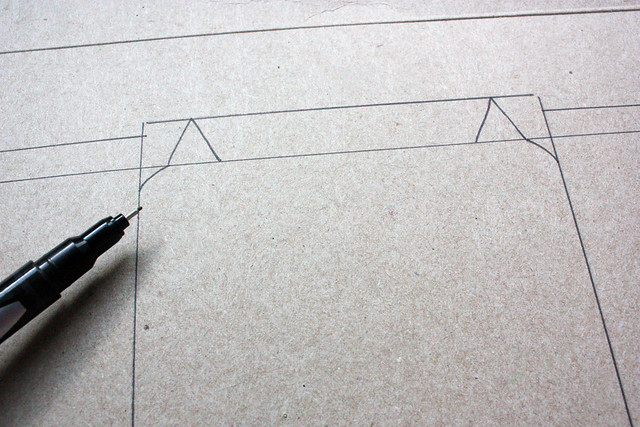
Bat card Tutorial On the top of the middle rectangle, draw two pointy ears and a small dip from both ears to the side of the rectangle (this will be the bats head).
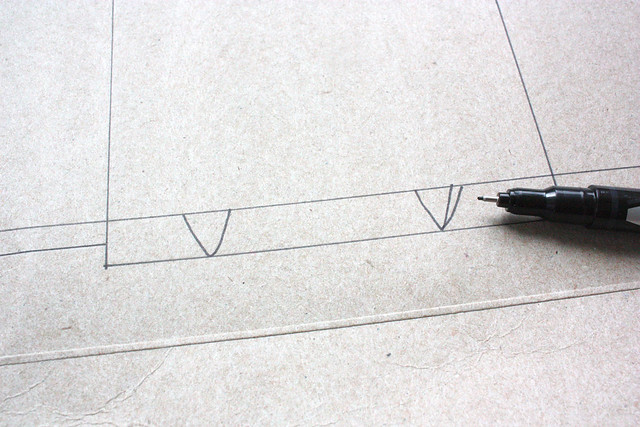
Bat card Tutorial At the bottom of the middle rectangle, draw two feet. As you can see, this is not an exact science. I screwed up the first one, so I just made the foot bigger. I felt my bat needed cankles.
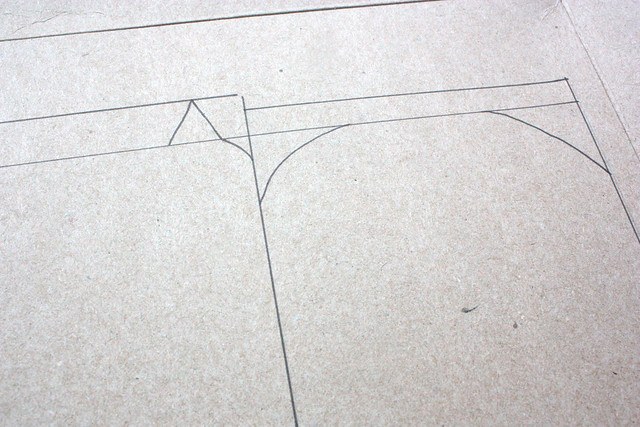
Bat card Tutorial To draw the wings, round out the tops of the smaller rectangles.
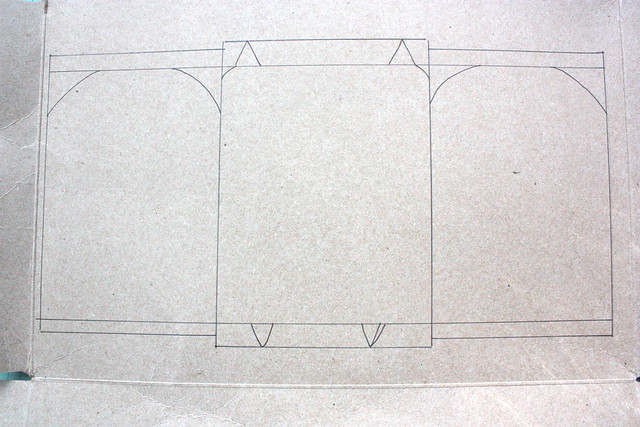
Bat card Tutorial This is what your template should look like right now. If it doesn't, don't worry, just go back and adjust anything you feel like doesn't look right. Remember, this is your template, you can redraw bat-canckles until the cows come home if you feel like it and your cards will still look super-impressive!
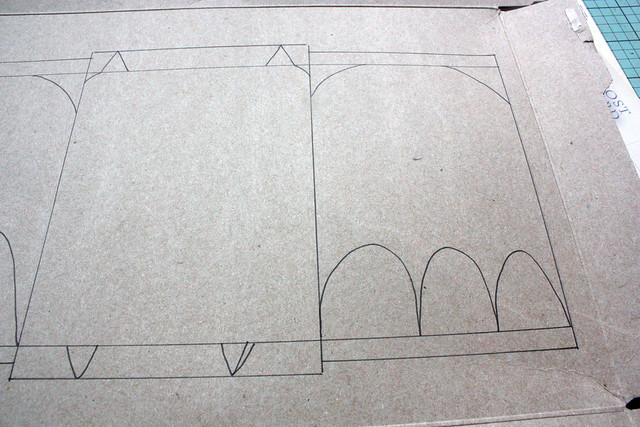
Bat card Tutorial Finally, the last step of your bat-drawing adventures is at hand. Finish off the bottoms of the wings with some arches. These can be as steep or shallow as you like. I felt like making a slightly meaner looking bat with some pointier wings. Totally up to you.

Honestly, if you're not sure about this step, you can just leave the bottoms of the wings totally straight. Anyone seeing the shape will know it's a bat, no matter how pointy or flat the wings are!

(Seriously! Don't give in on the "real bats have curves" hype! Your bats are perfect the way they are!)
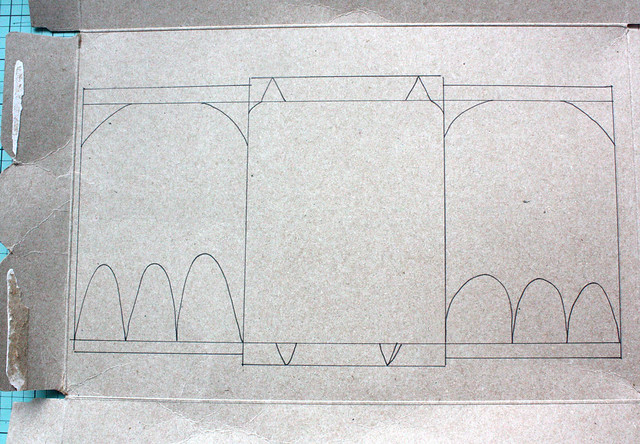
Bat card Tutorial And, you have a bat! Now, cut out that sucker!

(Get it? Bat? Sucker? Man, I'm so hilarious*!)
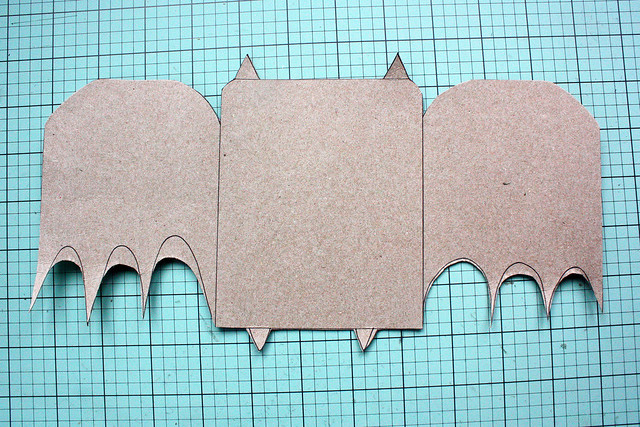
Bat card Tutorial Here's your bat template! You can obviously round out some edges or fine-tune your bat still if you want. I actually quite like this guy...

Once your template is finished, it's pretty simple from this point onwards. Even the old tutorial got this part right...
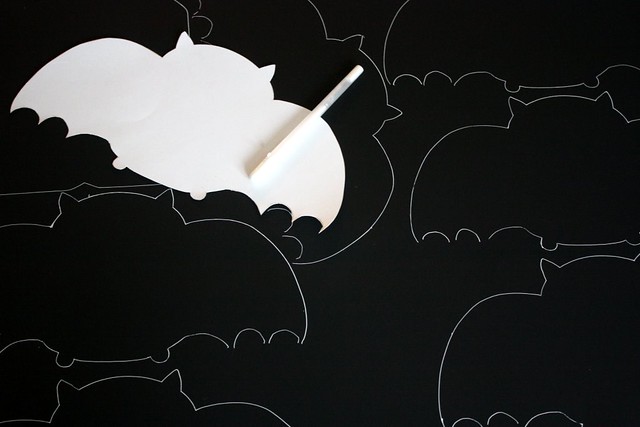
Halloween Bat Card Place the template on your black paper and trace the outline of the bat. Repeat as many times as needed or as fits on your paper.
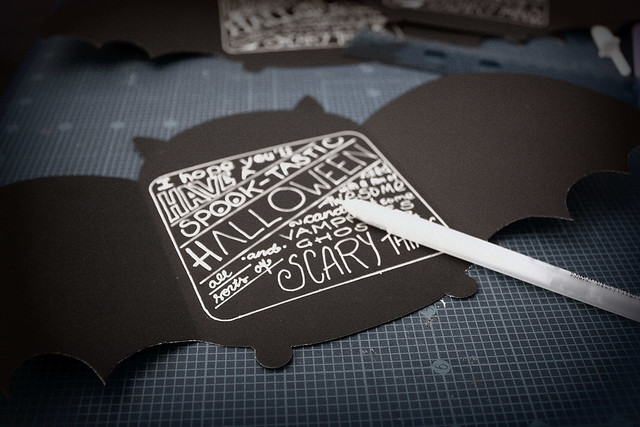
Halloween Bat cards Cut out your bats and fold the wings towards the middle. Fold them along the line where the larger and smaller rectangles meet.

And you're done! Just write away!

If you make these cards, I would love to see them! Please link your versions to this post!

As always, any comments are welcome! Did you feel this tutorial is better than the old one? Would you like more photos? More great jokes? Please let me know!

*) Ok, I'm sleep-deprived
Wednesday, September 17, 2014

DIY - How to make washitape at home

This is a tutorial on how you can make washitape* at home! It's easy, fun and pretty inexpensive. Anyone can do it, I promise!

DIY papertape Washitape has been gaining popularity recently and if you're at all interested in crafting, scrapbooking, snailmailing or any other paper-related activity, you've most likely heard of it. I, too, really like working with it and have accumulated a few (dozen) rolls of it. This is pretty clear if you look at my Snailmail posts on this blog...

The tricky thing about the tape is that it can be pretty expensive.There's a bazillion different prints, but picking only one can be tough. Pick a couple and you're all of a sudden racking up quite the bill. On top of that, despite those bazillion prints, sometimes I have this awesome paper that I wish was tape because I have this project that could totally use it... I can't be alone with these thoughts!

So, I wanted to share how I make my own tape at home!

DIY papertape
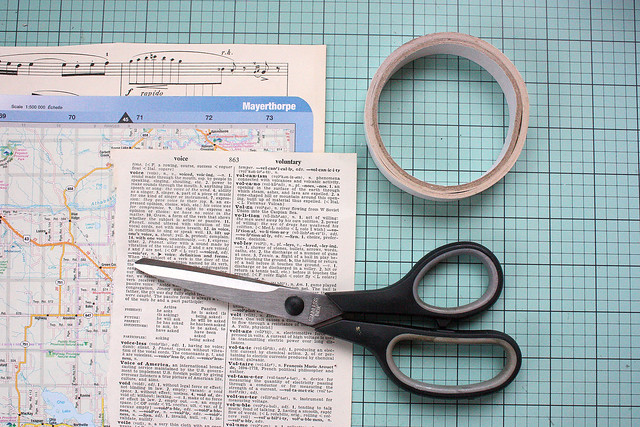
You'll need:

- Double-sided tape
- Scissors
- Paper of your own choosing (almost anything works; magazines, wrapping paper, etc. etc.)

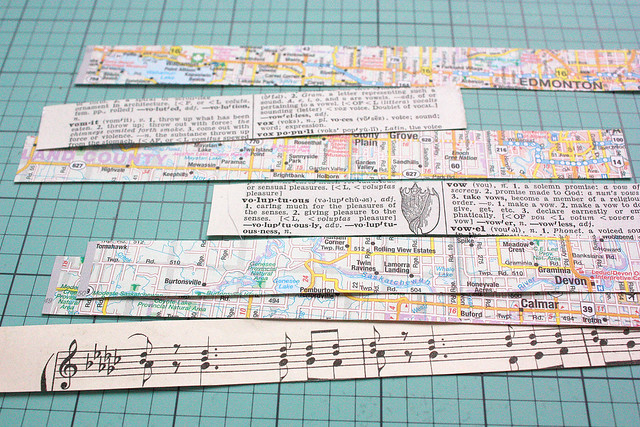
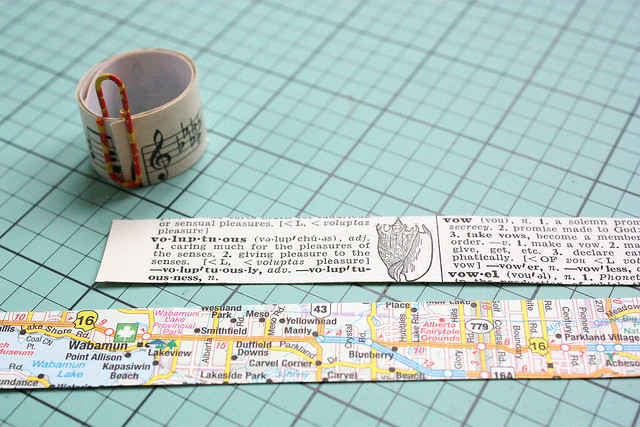
I'm using vintage paper; I picked a music sheet, a map and a page from an old dictionary.

DIY papertape
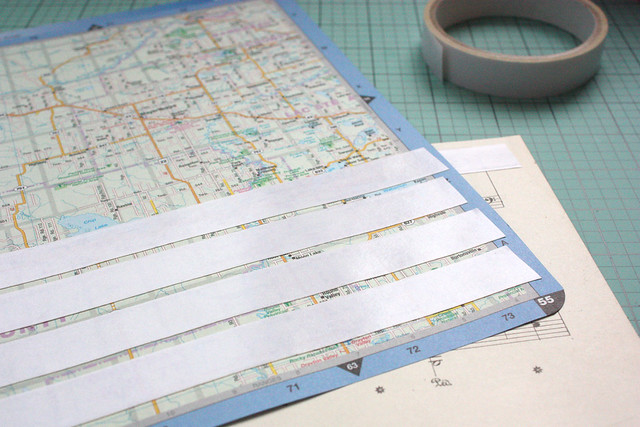
Pick the parts of the pattern you want on your tape and start sticking the tape on the opposite side. Run your finger over the tape to make sure it sticks properly.

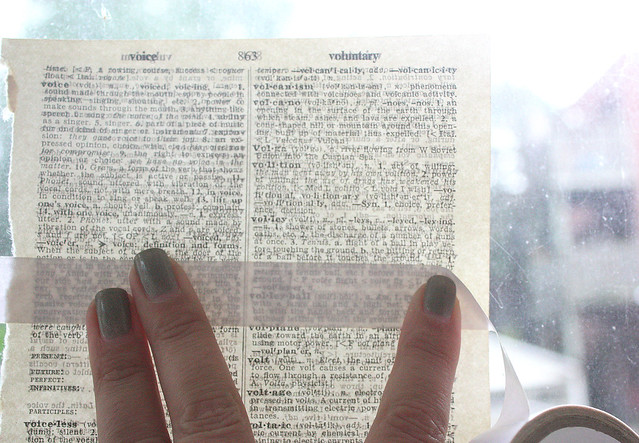
DIY papertape If you're using thin paper, like the dictionary page I used, you can place the sheet against a window to see exactly where to place the tape. I wanted the illustration of the shell to show on my tape.

DIY papertape On some materials the placement doesn't really matter, like on the map. It'll look cool, no matter which part is showing. You can just stick several pieces of tape on it and they'll look really fun once they're finished.

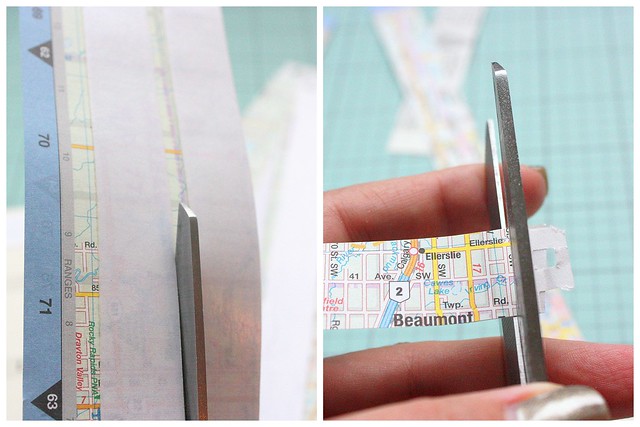
DIY papertape Once you've laid down the tape, start cutting the strips out. Cut the lengths first and then trim the ends if needed.

DIY papertape
Woohoo! You're done! Off to crafting!

You can use this for most projects you'd use regular washi tape. I find there's two major differences though, 1) the DIY version is not repositionable (unless you use repositionable double-sided tape, which apparently exists. I Googled it.) and 2) this is harder to tear, so you might want to cut it instead of tearing it to size.

*) Please note that I use the term "washi tape" loosely. Technically washi tape is made from Japanese Washi paper. So, I guess the more accurate term is paper tape. I'm using the term "washi tape", since that is the common term used to refer to this type of a crafting material.
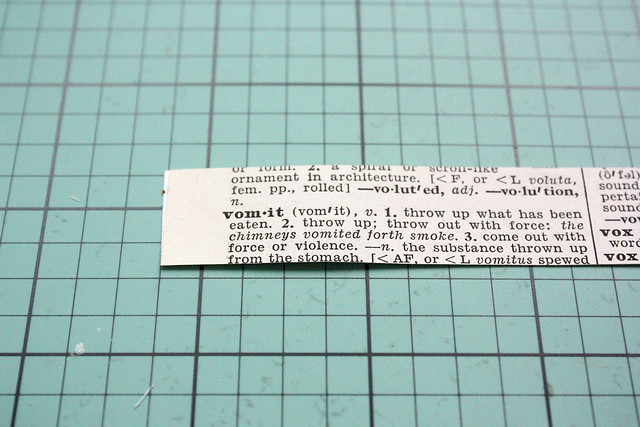
P.S. Learn from my mistakes: If you use a dictionary page like I did, actually check which word you're using, don't just slap the tape on any word...

DIY papertape

Wednesday, August 6, 2014

Repurpose - Brochures and Magazines to gift tags

Magazines, brochures and other printed materials accumulate so easily. Sometimes you come across visually beautiful things you want to keep, but after a while they take up so much space... I've been making a point to use those materials up and making gift tags is one of the easiest ways to put those pretty papers to good use. This tutorial works with practically any paper you might have lying around at home, magazines, catalogs, gift wrap, etc...

DIY gift tags from brochuresI've made gift tags myself for a very long time. After a while you figure out the best way to do them and realize how fun and versatile this little project is. Again, this is super simple, easy to do and doesn't need complicated materials or tools to make. This is also a good project to do ahead of time, just to have a few tags in stock in case you need one for a quick present.

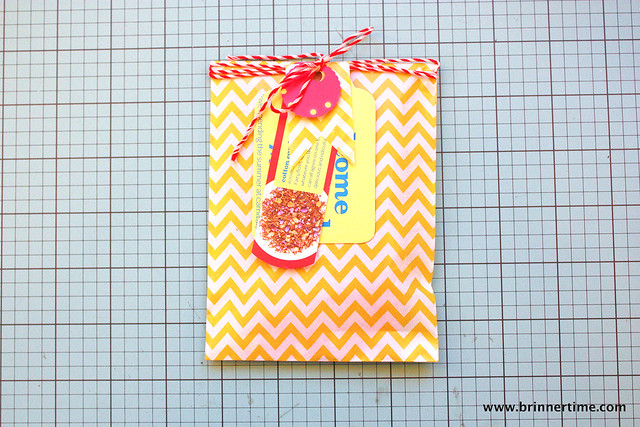
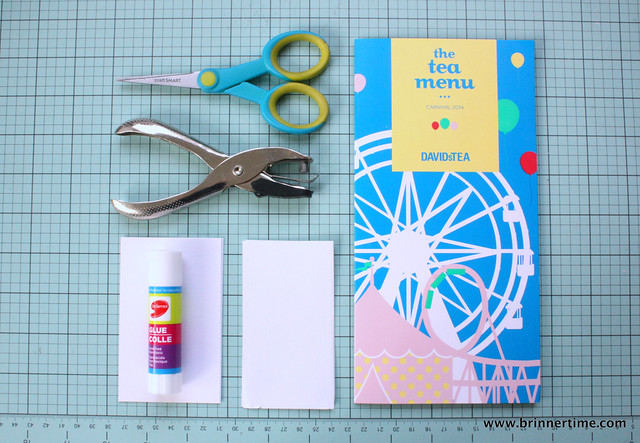
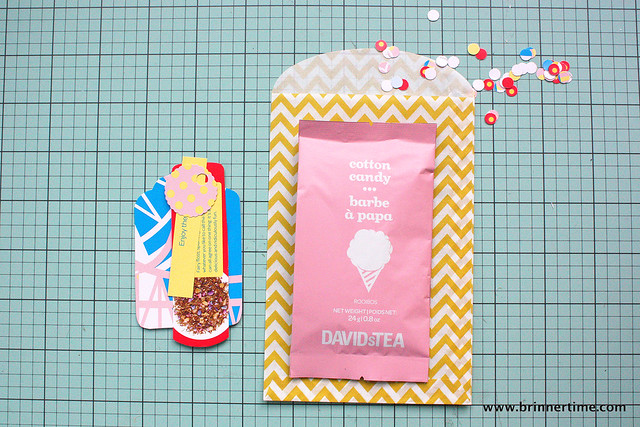
I recently bought some of the new flavors from the Carnival Collection from David's Tea. I know a few tea enthusiasts who I thought would appreciate something different, so I wanted to send them a small bag of the tea. The tea menu got a new look for the summer and I used the brochure to make some cute tags to attach to the tea as I sent it out.

DIY gift tags from brochures To make the tags you'll need

- Scissors
- Hole punch (I have a handheld one, but the regular offic-y one works just as well)
- Glue
- Paper/cardstock *
- Brochures/Magazines/Wrapping paper/etc

*) Choose the paper/cardboard depending on the thickness of your material. Cardboard for magazine, paper for sturdier brochures. Use household packaging for the cardboard, I find cereal boxes awesome for this purpose!

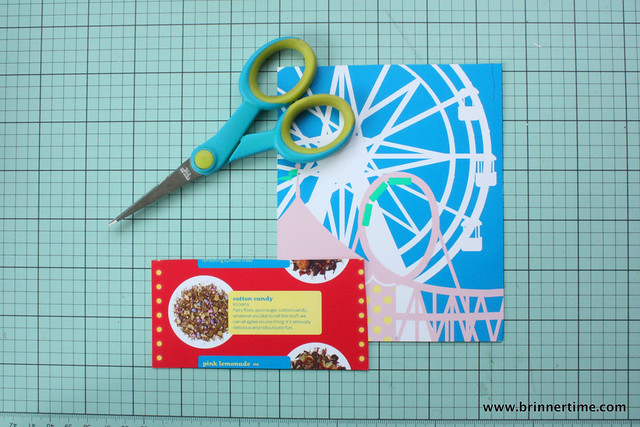
DIY gift tags from brochures I started by cutting out the parts of the brochure I liked. I chose some of the larger illustrations as well as the details of the specific tea I bought. Don't toss the rest of the material yet, you can use some of it for decoration! Check the materials again to see if there are any other interesting things to use: small pictures, text, etc.

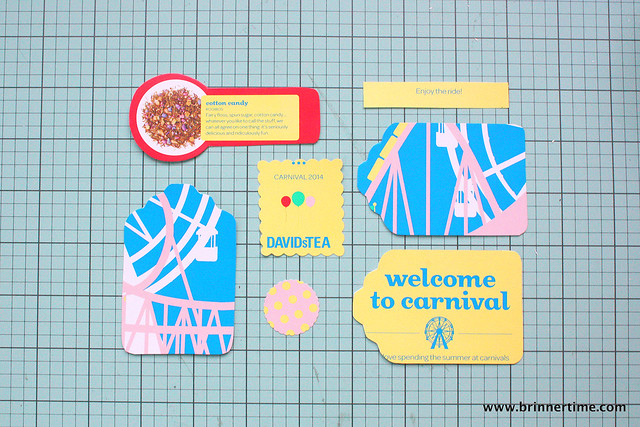
DIY gift tags from brochures Cut the material in the shapes you want. I had some gift tags already, so I used them as a template to make the more traditional tag shapes. I really don't see why they would need to be actual tag shapes though, if you don't have any at hand, squares and rectangles work just as well. I cut various different shapes out of the brochure. If you have paper punches, those are really handy, but not at all necessary.

If you have a nicely shaped tag you like, make a template out of it for future use. You can follow the envelope tutorial for help to make the template.

Glue the paper or cardstock on the back of the tags for writing surface. I only put white paper behind the large ones I used for writing, the small ones have no paper on the back.

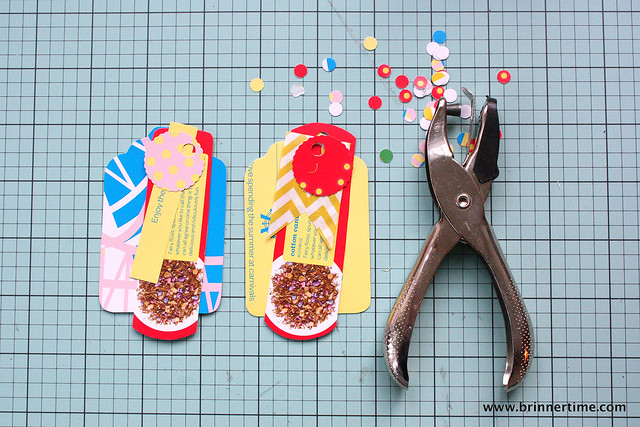
DIY gift tags from brochures Punch holes in the tags.

I really like the layered look, so I combined several different shapes and sizes. This is especially effective if you cut out basic shapes like squares or rectangles.

To add a little extra, I packed the tea in a small paper bag. I had a few extra bags, so I cut one up to add the little banner shape in the pile-o-tags as well. And, let's not forget confetti! Punch a bunch of holes into the remaining material to make coordinating confetti! Stuff that shit everywhere!!!*

DIY gift tags from brochures *) Unless the recipient has cats or toddlers. In that case don't be a dick and just leave the confetti out. Same goes for glitter by the way.

So, what do you think of these repurpose posts so far? Useful or not? I'm also thinking of posting variations of these tutorials later, just to show what you can do once you know the basics.

Any requests for future tutorials?

Saturday, July 26, 2014

Repurpose - Button envelopes


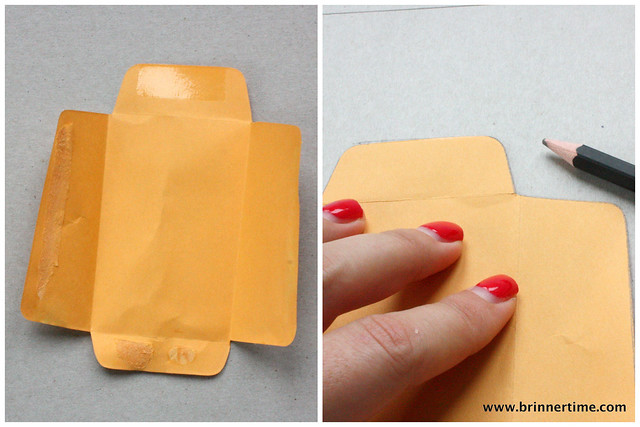
Repurposing everyday items I recently went shopping for some new clothes. Not my favorite pastime, but I desperately needed some new summer gear. I found a few things I needed and as I got home, I removed some of the tags. A pair of shorts I bought had one of those little pouches for the extra button.
Repurposing everyday items I really liked the shape and size of it, so I wanted to make some for later use. You cant have too many tiny envelopes, right?

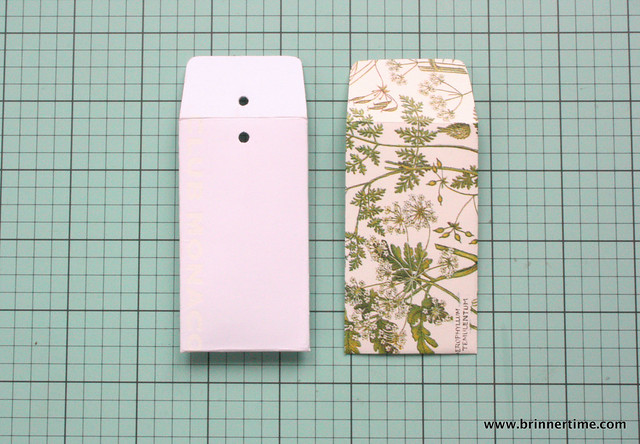
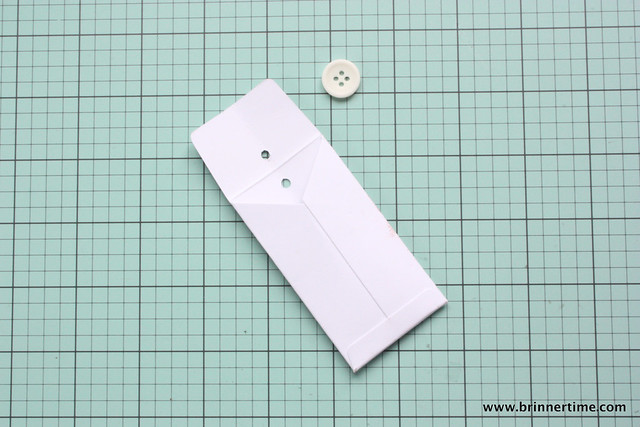
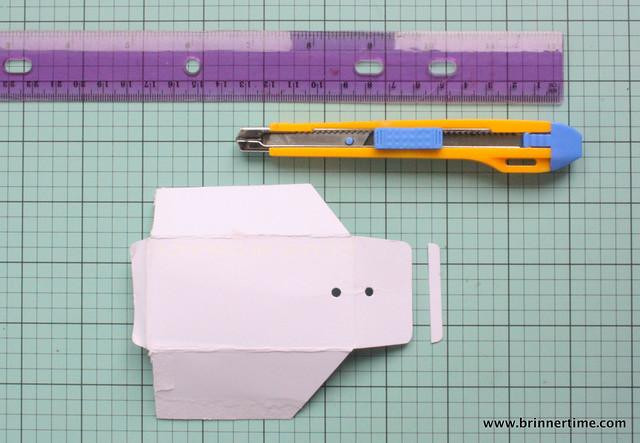
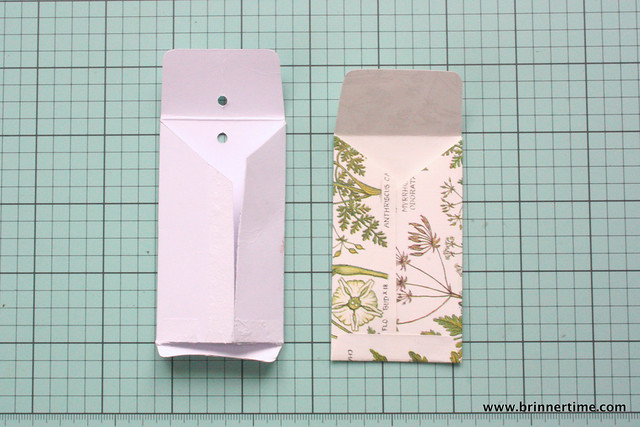
Repurposing everyday items I took the envelope apart from the seams and modified it a little bit. Basically I just thought the flap to close the envelope was unnecessarily long, so I just cut off a little bit. If you do something like this, just make sure to check that the flap still covers the opening.

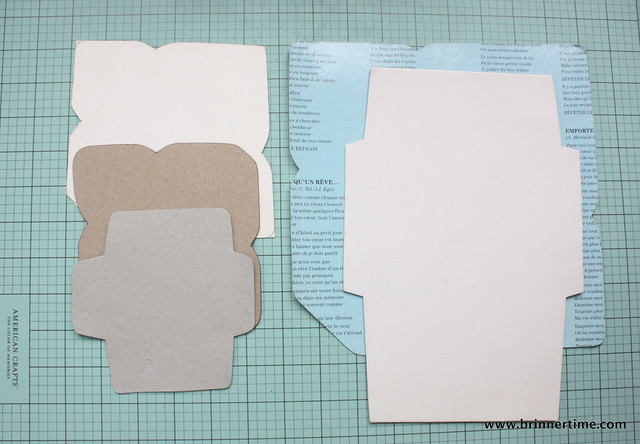
Once you're happy with the shape, use THIS tutorial to make a template.

Repurposing everyday items If you like to save the buttons in the envelopes they come in, you can just glue it back together afterwards. These are usually very sturdy.

Friday, July 4, 2014

DIY - How to make awesome envelopes

I have several fun projects I want to share with you guys and I want to start with a tutorial for something I use all the time; DIY envelopes!

Envelope template tutorial, www.brinnertime.com I make envelopes on weekly basis, some for my own use and some for my shop. They're super fun to make and I have to admit I sometimes make them just because I found a cool piece of paper...

There's probably a ton of different ways to make envelopes at home, but I prefer to use a template*. I have at least 10 different ones I've made for myself and will, for sure, keep making more. I am very particular about what kind of envelopes I like, so when I see a shape and type of an envelope I like, I make it into a template.

So, to get started, find an envelope (or a few) that you like**.

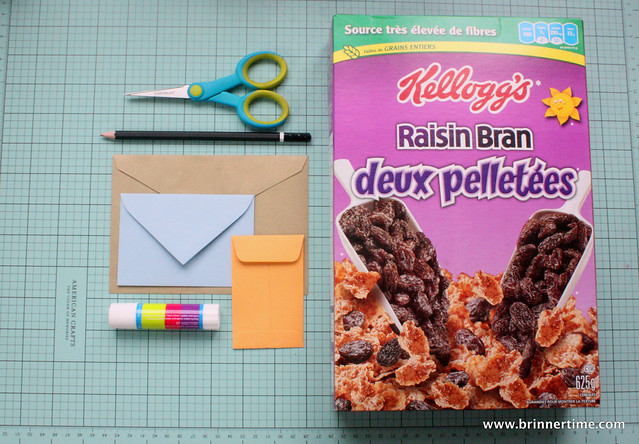
Envelope template tutorial, www.brinnertime.com You'll need:

for the template
- envelopes
- scissors
- pen or a pencil
- cardboard (any sturdy material will work, I use a lot of cereal boxes) size depends on how large of an envelope you are making

for the envelopes
- paper (I'm using scrapbooking paper for this tutorial, but anything you like works; wrapping paper, book pages, etc)
- glue

Envelope template tutorial, www.brinnertime.com First, take part your envelope by opening it from the glued edges. Do not cut it, just pull the glued sections apart. Don't worry if the envelope rips a bit, this is exactly why we're making a sturdy template, not using the original envelope. If the envelope that you're using does not come apart easily or if you're using one made from a very delicate material, you can always soak the glue***.

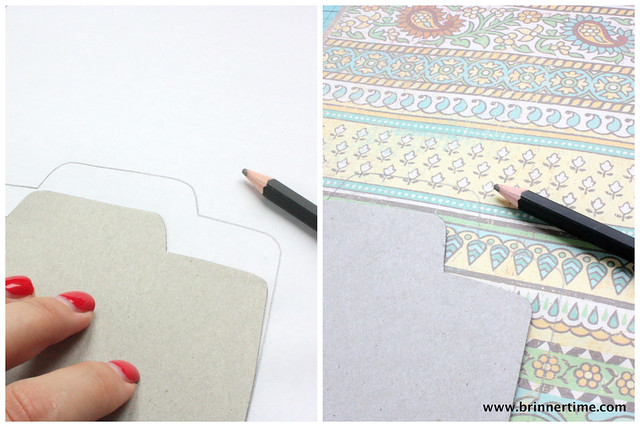
Once you have the envelope opened, trace the outline carefully on to your cardboard. If your envelope is badly ripped, made of very delicate material or you're not comfortable in your tracing abilities, then glue the envelope directly on your cardboard.

Cut out your template.

Envelope template tutorial, www.brinnertime.com You now have a template to start your envelope-making with!

To make an envelope with you brand-spanking-new template is super easy (and really fun, be aware that you'll make a ton).

Start by selecting a paper. (So much fun!) Experimenting with different types will give you very different and cool results. Try small patterns vs. large images or gift wrapping paper for different effects.


Envelope template tutorial, www.brinnertime.com Trace the template outline on to your paper. Depending on the paper you choose and your own preference, you can either trace on the 'wrong' side of the paper or on the pattern side.  Think about the direction of your pattern as well. You don't want someones face upside down on the front of the envelope (or maybe you do, that could be kind fun too). Experimenting is the key again, but if you're trying this out for the first time, I recommend tracing the shape on the side of the paper you want to be the outside of the envelope. That way you have more control what will be displayed on the front.

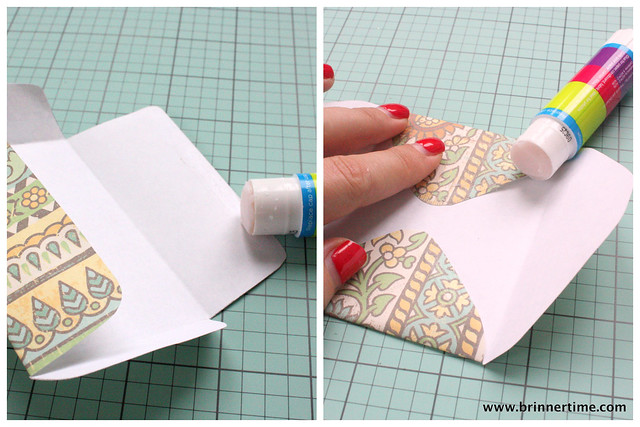
Envelope template tutorial, www.brinnertime.com Cut out your envelope shape and fold the sides. Most envelopes are constructed the same way: first the side flaps and then the bottom one. Fold all sides before gluing just to make sure it looks the way you wanted.

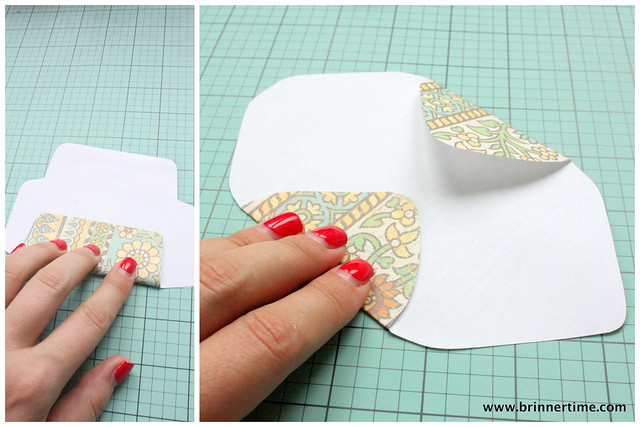
Envelope template tutorial, www.brinnertime.com Glue the flaps. Usually the bottom flap onto the side ones, but depending on the shape you might need to glue the side flaps together first (see the photo on the left).

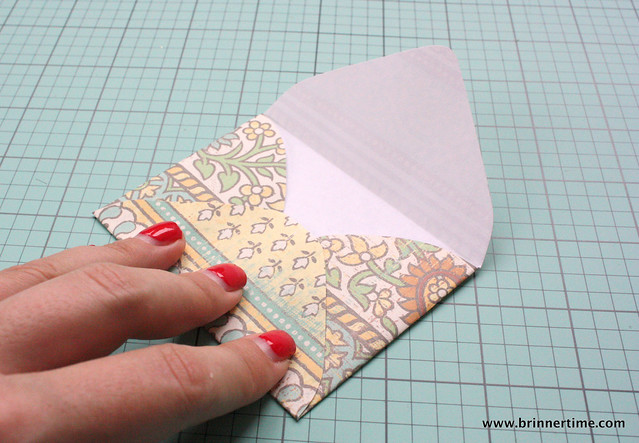
Envelope template tutorial, www.brinnertime.com Apply some pressure to make sure they stick together firmly. If I'm not using the envelope immediately, I like to press the envelopes. Just put them inside or under a heavy book until the glue sets****.

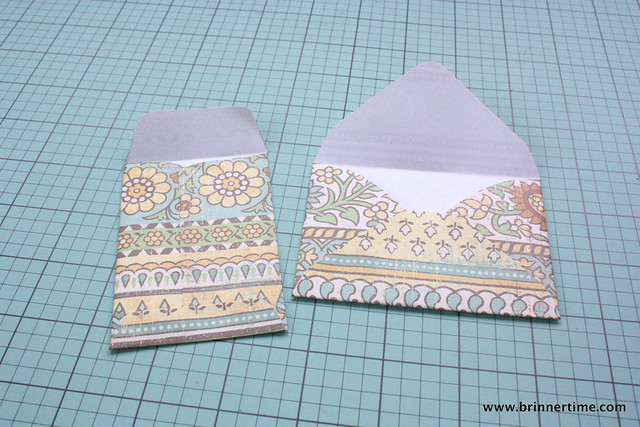
There's so many things you can do with the templates. Check the transparent envelope tutorial HERE or the coloring book envelope tutorial HERE

I'd love to see the envelopes you make. Please share if you make some!


Footnotes:
* if you don't want to make one, you can buy ready made templates at very reasonable prices. For example: check Paper Pastries Shop for one HERE

** If you don't have any unused ones at home, check mail that you received (yes, even bills). There are also plenty of free printables online.

*** To soak, just immerse the envelope in a little bit of water. As soon as the glue comes apart, take the envelope out of the water and on to some newspaper (or kitchen/paper towel) to dry. Once dry, continue with the rest of the steps.

**** Just don't use a book you still plan on reading. I have a heavy book that's slightly damaged I use to press my envelopes in. This way any spilled glue doesn't ruin your favorite book.

Wednesday, April 10, 2013

Easy dinner - potato gnocci with balsamic mushrooms and sun-dried tomatoes

I haven't posted any interesting recipes here recently, for the simple reason that I've started some corrective measures in my diet. I am more than happy to talk about eating healthier and loosing a few pounds in the process if anyone's interested, but for now, there is one recipe I tried and absolutely loved.

Potato gnocchi with balsamic mushrooms and sundried tomatoes  

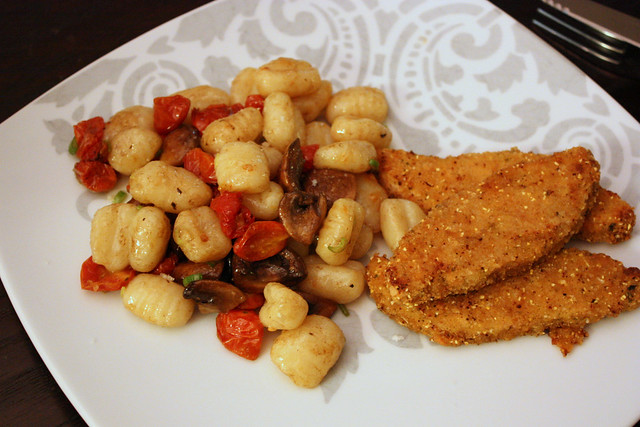
Potato Gnocchi (salad) with balsamic mushrooms and sun-dried tomatoes


It's again a recipe that looks and sounds rather impressive, but is super easy to make. This one, I'm proud to say, I came up with myself. Often I find recipes online that I like and make my own version of them, but this one came from to fruition simply I really felt like having gnocchi but didn't want to do my usual recipe of gnocchi in tomato sauce. To make this version, you'll need

Package of potato gnocchi
Sun-dried tomatoes (to make them at home, try this recipe)
Mushrooms (balsamic vinegar and salt for cooking)
Green onion

Dressing
Lemon juice
Balsamic vinegar
Olive oil
Salt
Pepper

Please note that you could add anything you like in the dish. I'm thinking fresh tomato, basil and mozzarella cheese would be amazing.

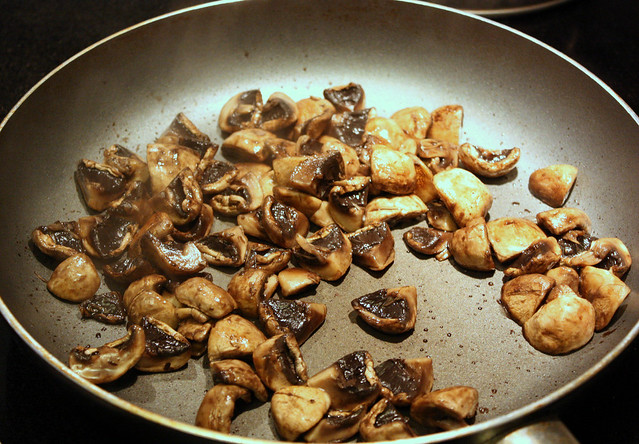
Start by frying the mushrooms. I have one specific way of cooking mushrooms and I use it all the time.

balsamic mushrooms
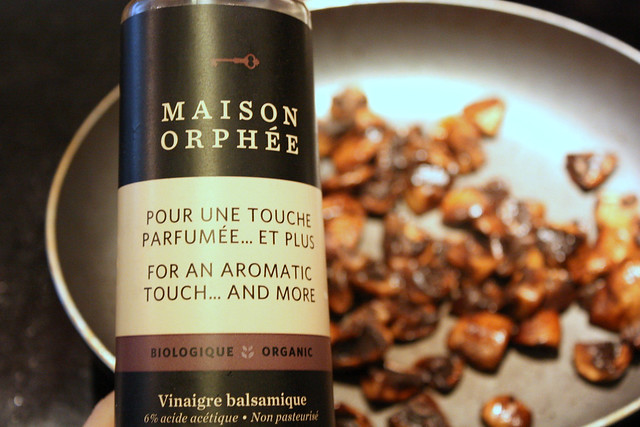
balsamic mushrooms Basically quarter the mushrooms and start frying them on medium heat with a little bit of oil. After a while the mushrooms start releasing the liquid. Sprinkle them with a little bit of salt and cook until almost all of the liquid has evaporated, then drizzle them with a few tablespoons of balsamic vinegar. Cook for a few more minutes so that all of the vinegar has been absorbed by the mushrooms. The results are amazing and so much better than plain ol' mushrooms. I fry up mushrooms like this for a lot of different recipes, I just find it adds a little extra.

While the mushrooms are frying, cook the gnocchi. It's very easy. Bring a pot of well-salted water to boil. Dump in gnocchi. They are ready once they gnocchi floats to the surface. This won't take more than 5 minutes. Prepare the dressing by combining equal amounts lemon juice and balsamic vinegar, half of that of olive oil (for example, 2 tablespoons of lemon juice, 2 tablespoons of balsamic vinegar and 1 tablespoon of olive oil), add a little salt and fresh pepper.

Combine the gnocchi, mushrooms, sundried tomatoes and dressing. Mix together and sprinkle with finely chopped green onion.

I actually served this room temperature as a posh-sounding potato salad, instead of hot, but it works both ways.

Enjoy!

Wednesday, March 27, 2013

Easter egg card DIY

It's time for Easter mail. Once again, I'm using a popular holiday as an excuse to send more mail.

For once I have plenty of photos of this project, so I'm breaking it into two separate posts. This first one would be a fun project for kids to do as well. (I think. I don't have any, so I'm only assuming.)


I wanted to make a simple card to use in my outgoing mail. I had plenty of other ideas as well, you'll see those soon, but besides all the other random things I was planning on sending, I wanted to include something fun to write the wishes on. Since this is Easter mail, what better (and, honestly, easier) than Easter eggs? Also, bunnies. Thou shalt not forget the bunnies!

Simple DIY Easter cards
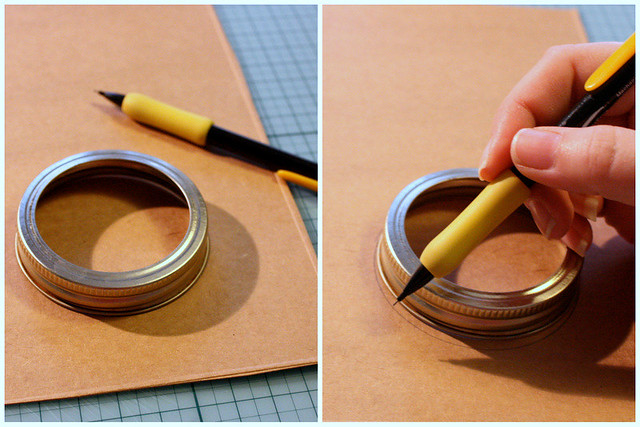
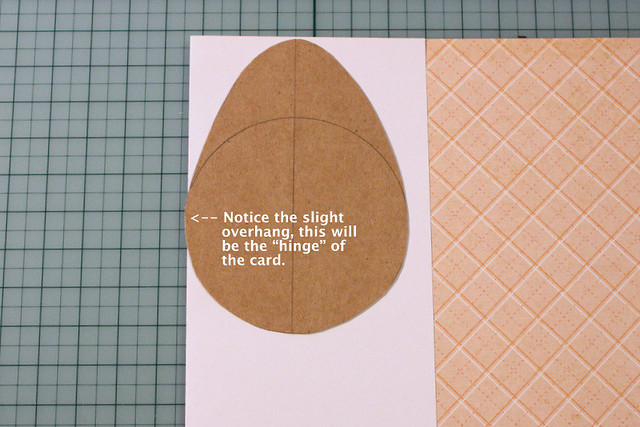
To start out, make a template (I'm sure there are some online you can just print out. If you do that, just copy the shape onto cardboard). To make one yourself, you'll need sturdy cardboard (I used a cereal box), pencil and a round object to use for drawing circles. A glass or a mug would work, I used a lid from a mason jar. Draw a circle on the cardboard.

Simple DIY Easter cards
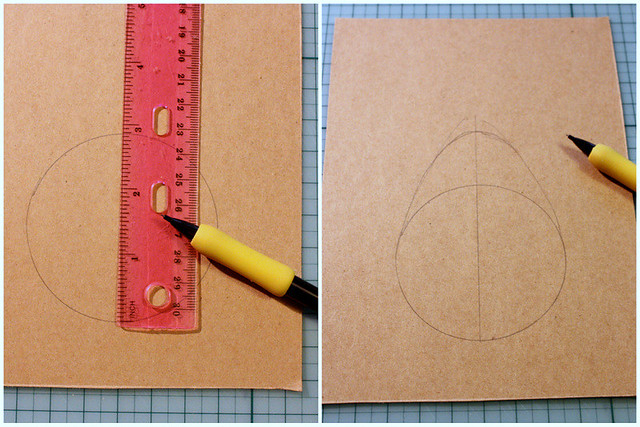
Then, using a ruler draw a line across the circle and roughly about an inch above. How much outside of the circle you draw the line depends how large the circle is. For example, the lid I used was just around 3 inches across, so I drew the line about 1 1/2 inches over. That was way too much, the egg looked kinda weird.

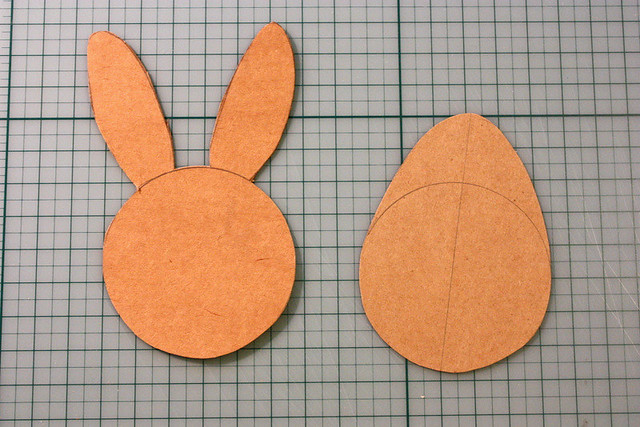
To make the egg shape, draw line from the side of the circle to the appropriate height on the line. Cut the egg out.

Simple DIY Easter cards
You now have a template for an egg. I also made one for a bunny. Same idea as the egg, just draw bunny ears on top of the circle.

Simple DIY Easter cards
To use the template, fold paper or cardboard in half and place the template on the folded side of your material. With the bunny, make sure the bunny's cheek and ear both touch the fold. Cut out your card.

And finally, decorate your cards.

Simple DIY Easter cards
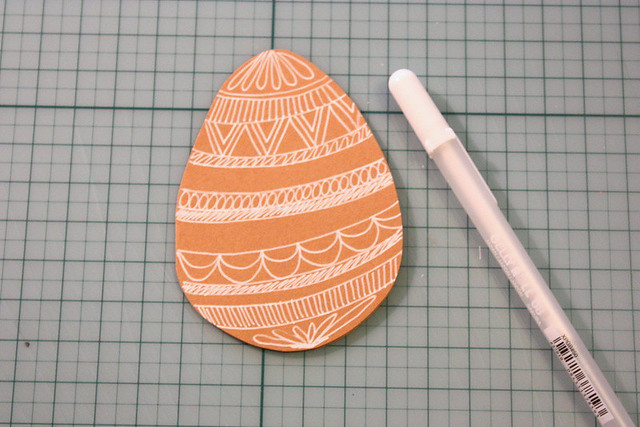
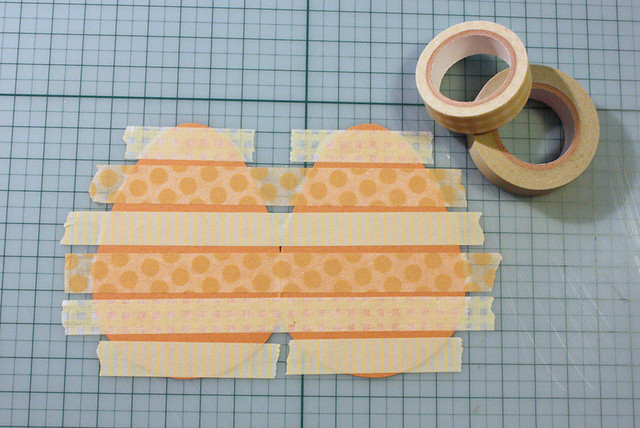
I tried out several different colored paper and card, as well as a ton of different methods to decorate them.  First is drawn on with a gel pen. Second, not surprisingly, decorated with washi tape. In the first photo of this post I used pale blue circle stickers on different colors of pastel card. You could also paint on them, use crayons or colored pencils or glue on a collage. Anything you have at hand will work.

I have another post coming up with photos of the entire lot of Easter mail I sent out. It includes photos of the packaging and the other things I packed with the cards. That will be up in the next few days, so stay tuned!

Did you send out any mail for Easter?